
Today, I'm sharing the nails I may be the most excited about this Halloween. Harry Potter nails. I was afraid I couldn't make any justice to these, but I feel like the design I came up with is actually really fun. And again, not too difficut to recreate, although I admit this one took me a while to make. Below, I'll break down why it took a bit more effort than some others.
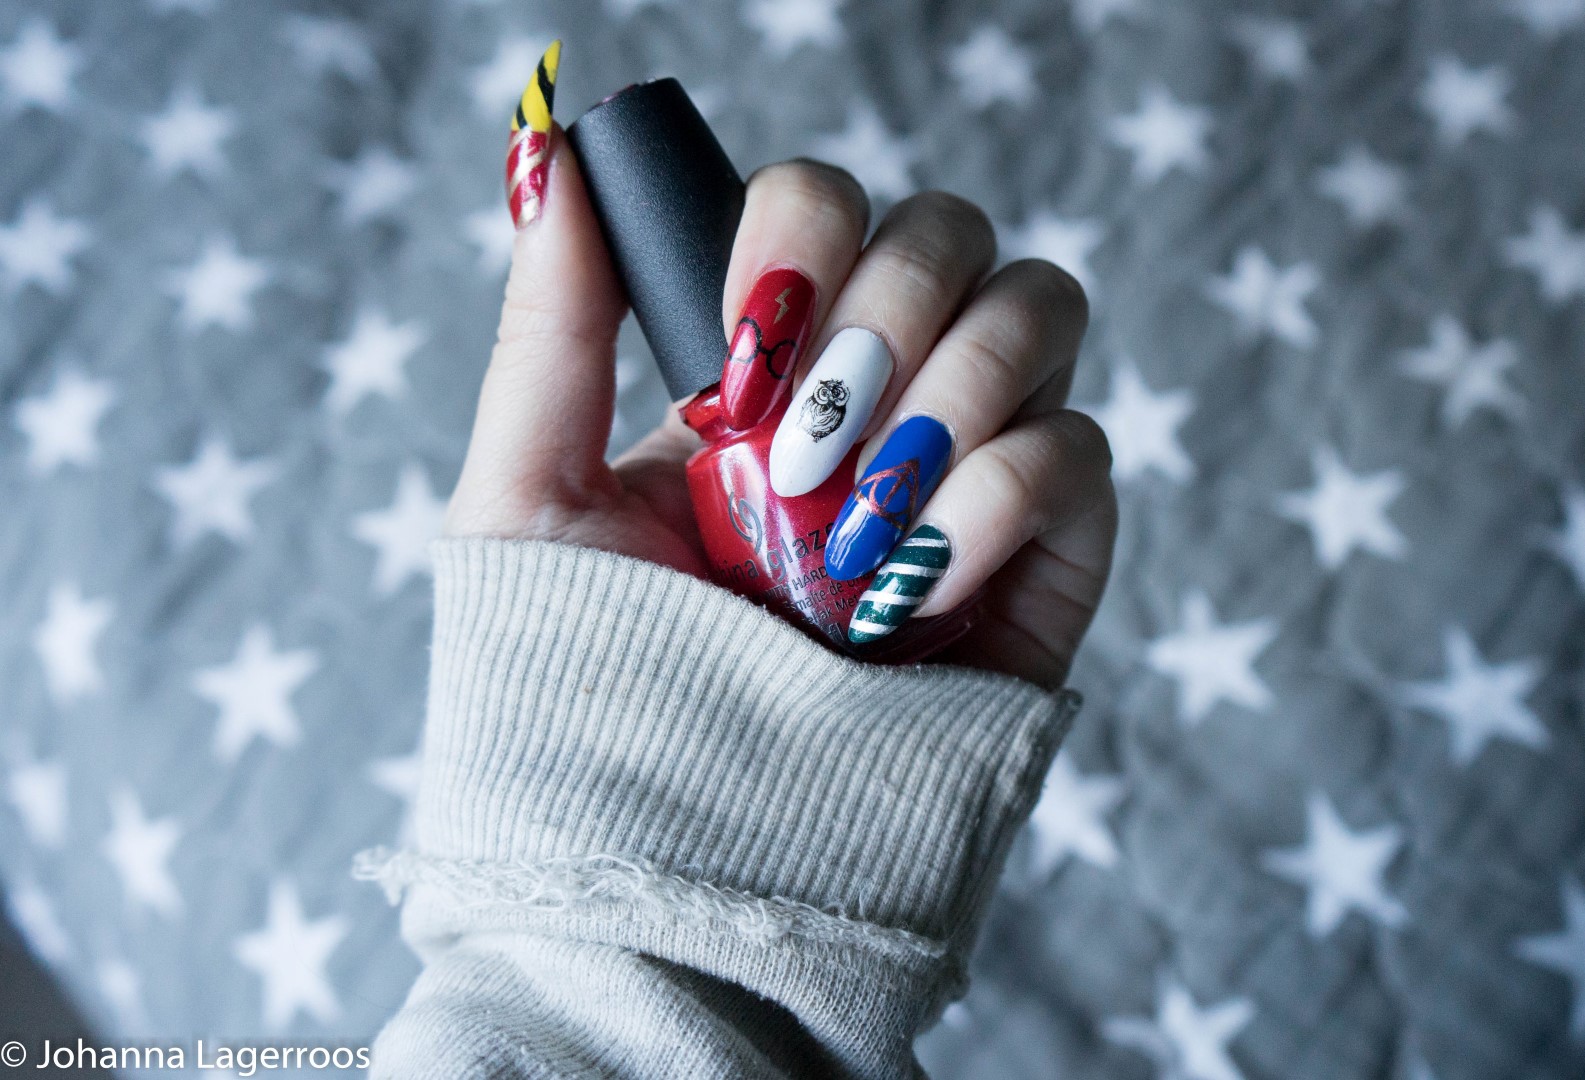
As you can gather from the first pic, there's kind of a lot going on on the nails, but yet the design is sort of simple. I tried to keep it fun but together by using the Hogwarts Crest colors as the bases too, and I think I managed to make it not too busy.
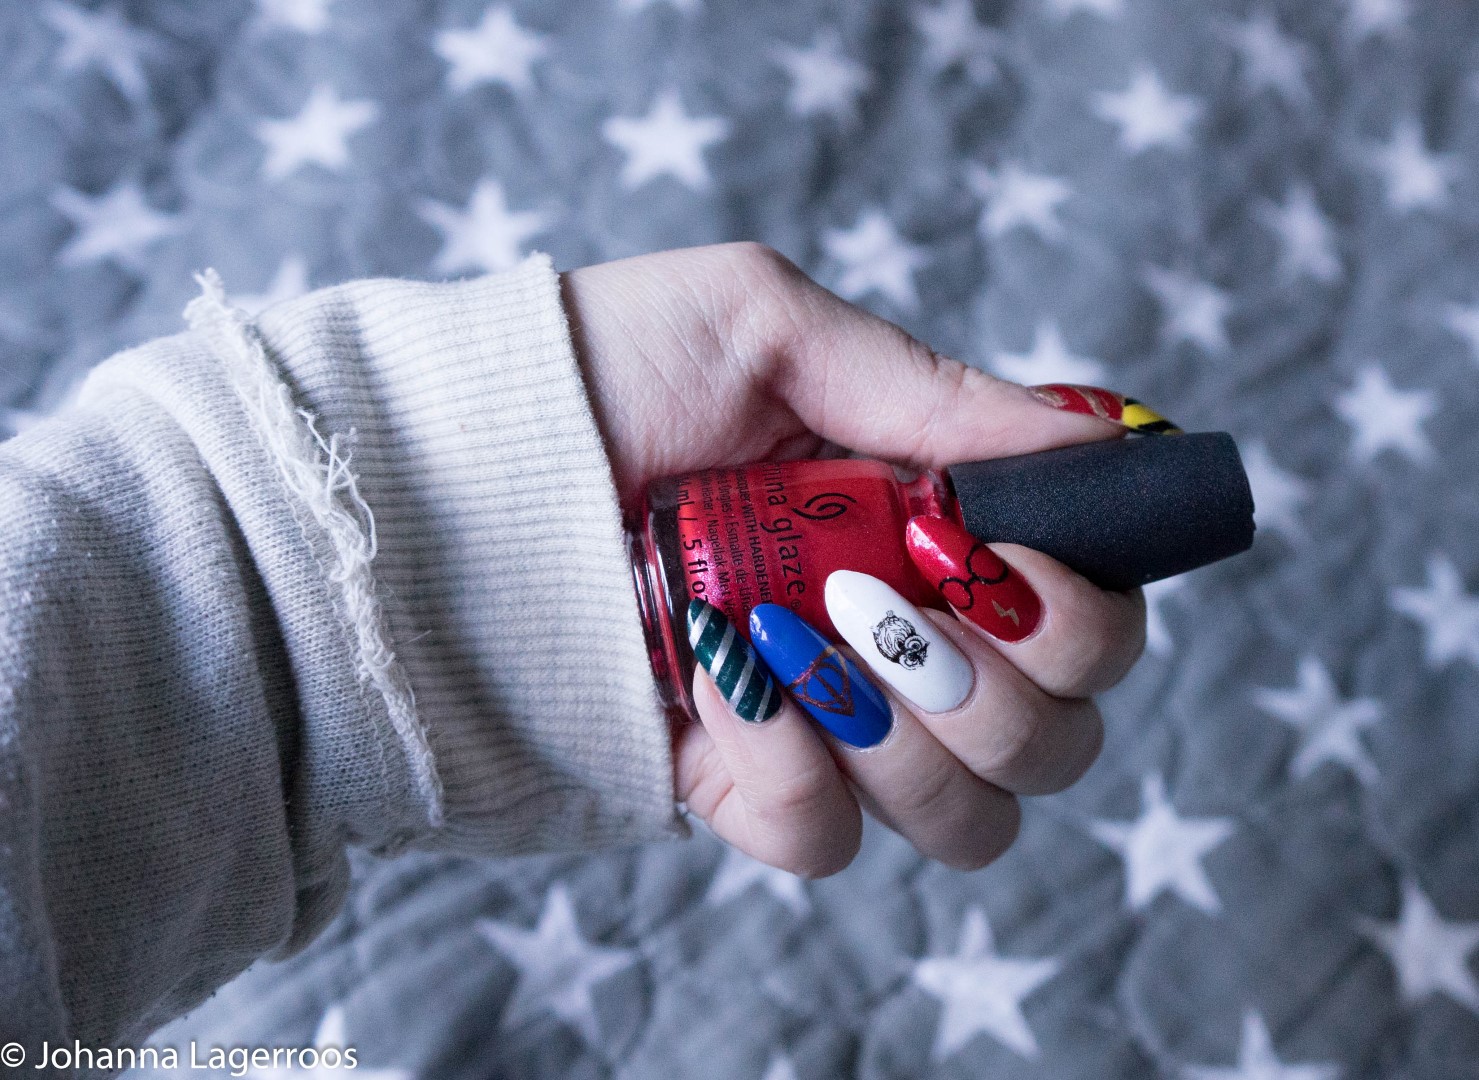
I tried to do the essential things to make these recognizable; House colors, Harry's glasses and "scar", white owl (Hedwig), Deathly Hallows and my own house (which is Slytherin).
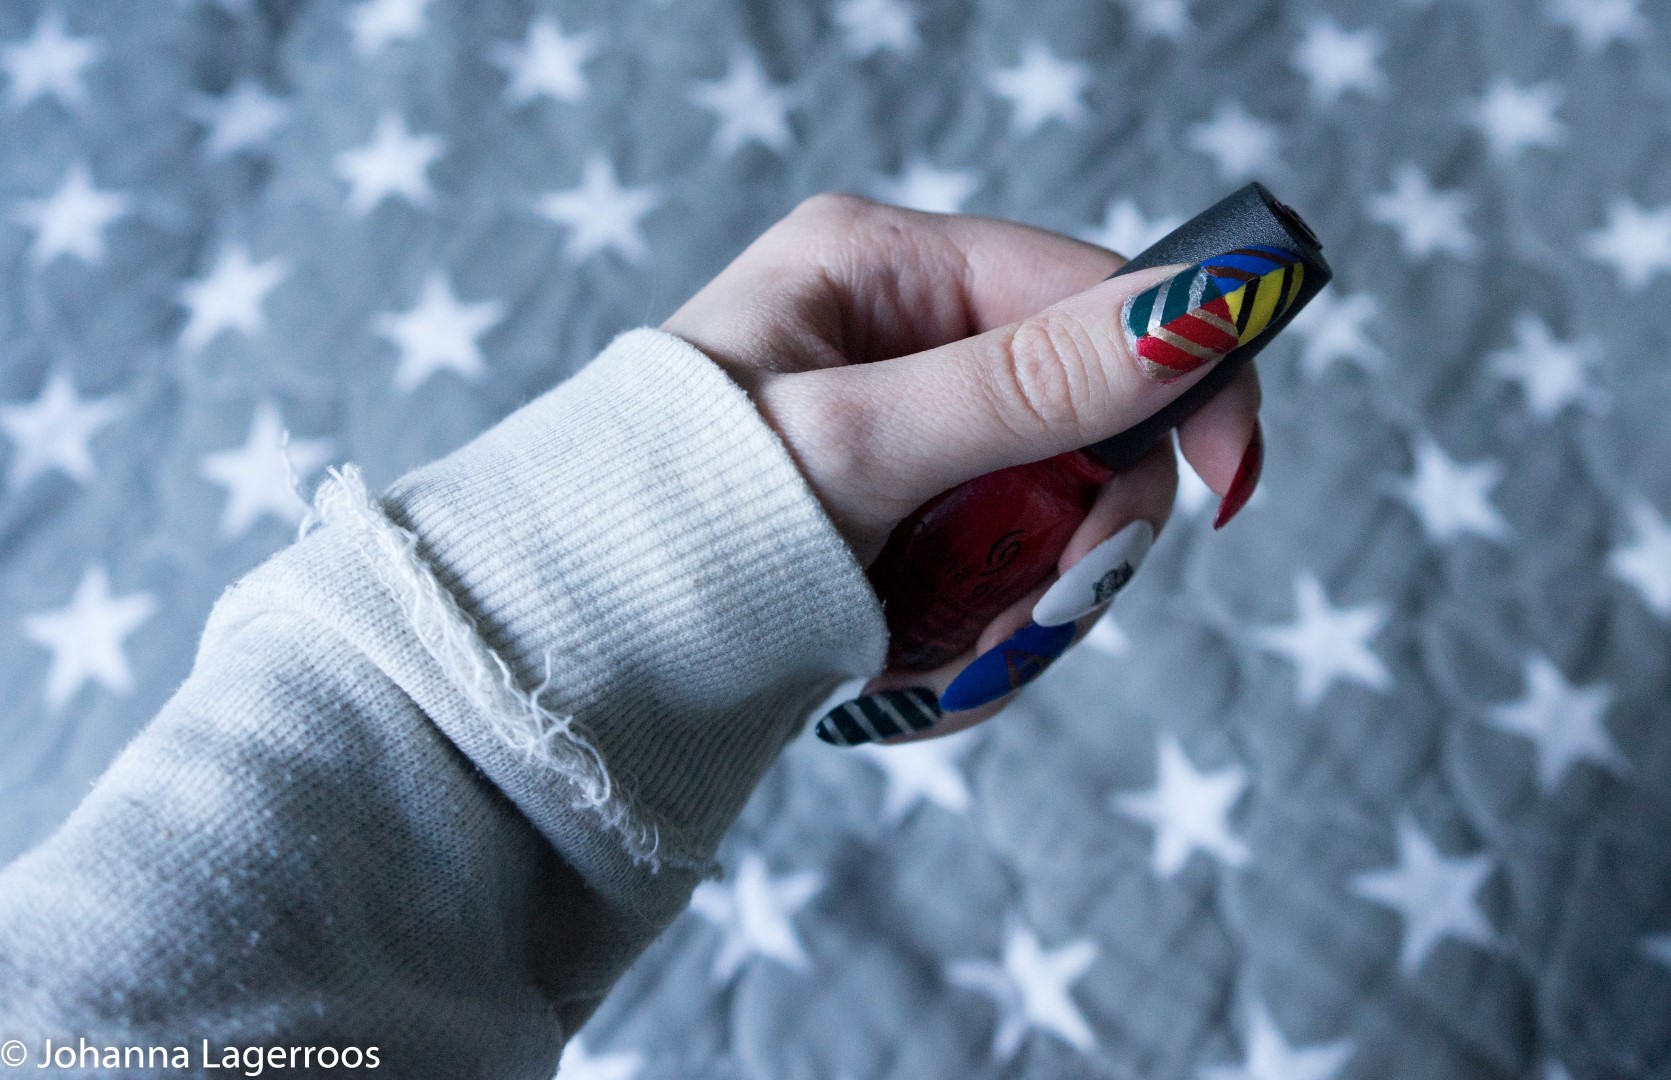
Now, why was this design time-consuming? Because of these stripes. Even though I made the crest simplified and just played with the house colors, this took a freaking while. I had to tape each section of color one by one when painting, and also each striped was done with the help of tape. If you have a steadier hand than me, go ahead and freehand this. I bet it takes shorter while that way. But with tape, you have to wait for layers to dry, add top coat etc. so the process is long.

Admittedly, the owl took a bit of damage before I got around to take pics - but I tried to fix it with black polish and did okay. To see how the owl should actually look, see the pic below. As far as the supplies for this, I used so many polishes and didn't really look which shades (sorry!), but for this you would need: blue, red, yellow, green, silver, gold, bronze, black and white polish - or acrylic paints for the details, those work too! In addition, if you don't want to freehand the owl or the stripes, you need owl decals (mine are from Shop Keeki) and striping tape. For the detail work, you need a thin nail art brush - and, unless you have literally the whole day to wait the polish dry, you need a quick-dry top coat.
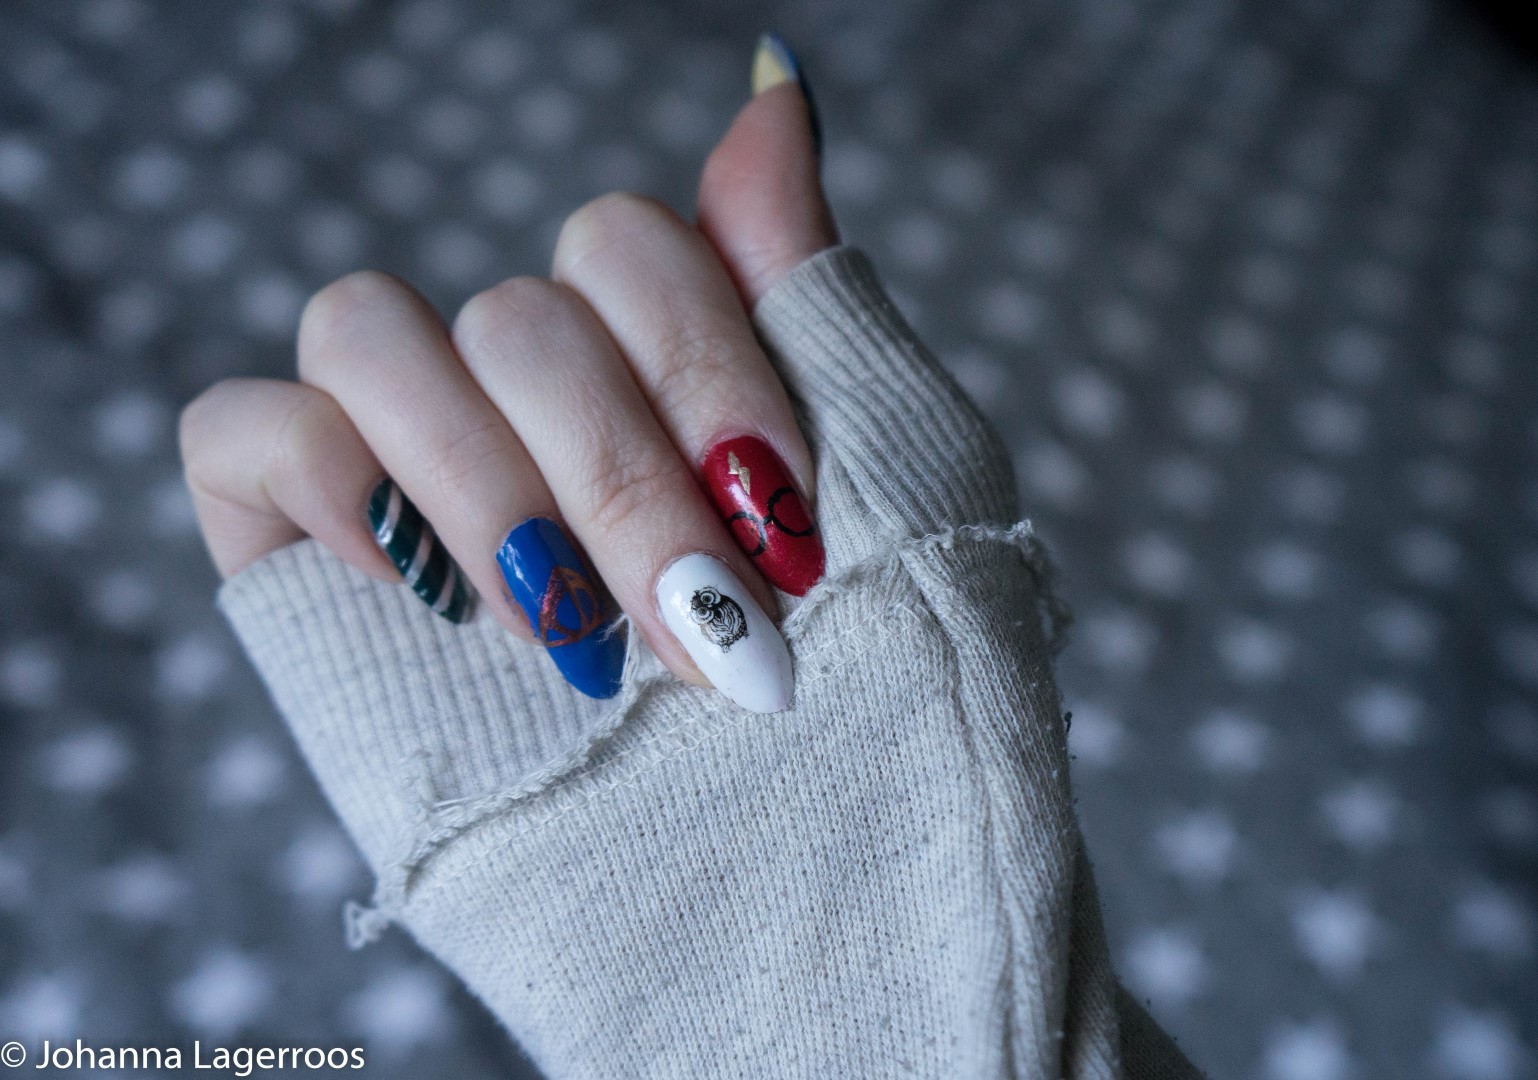
A rare gem: My right hand's mani. I usually don't show this hand as the nails are most times awkward lenght and the artwork tends to be messy (even after year's of practice). But, the owl looks better here. So you get to see the whole hand, as I didn't feel comfy giving you the middle finger.
Now, the question remains: Which house are you in? Let me know in the comments!
I know I've done quite a bit of Harry Potter stuff this year, but we are re-watching the movies so I felt really inspired. And as some of you probably know, I am quite the Potterhead (which my boyfriend has gotten aware of as we watch the movies, oops!) so doing anything Potter related seems natural to me. This was the last Potter-inspired thing for this Halloween season - unless I got some last minute inspiration over some of my original plans. Stay tuned for the rest of the posts to find out if I strayed back to this theme! I'll see you all in my next post.
Have a wonderful day ♥


No comments
Thank you for taking the time to leave a comment for me. I always read every single one of them, and they truly make my day! Please remember to be nice while commenting, thank you! ♥
You can comment in following languages (as these are the ones I understand):
English, Swedish, Finnish, Spanish, German
xoxo ♥