What's In My Bag (and how to get it organized!) ♥

Hello my lovelies!

How are you all today? ♥

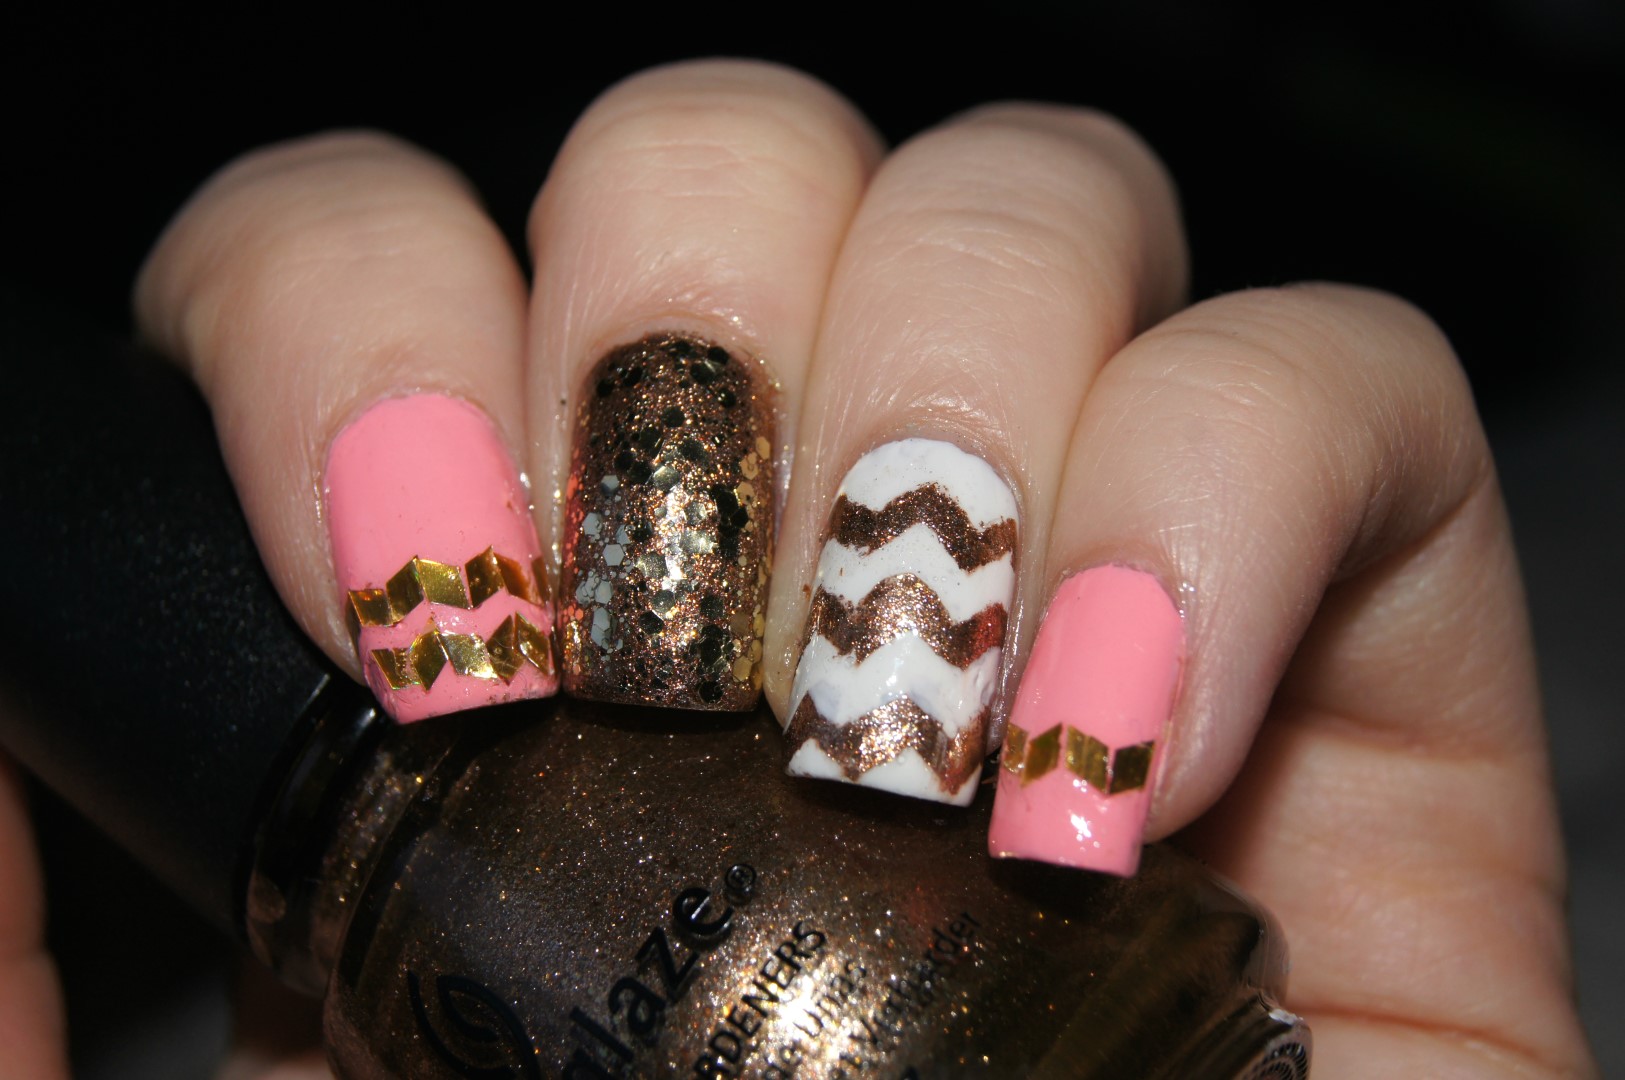
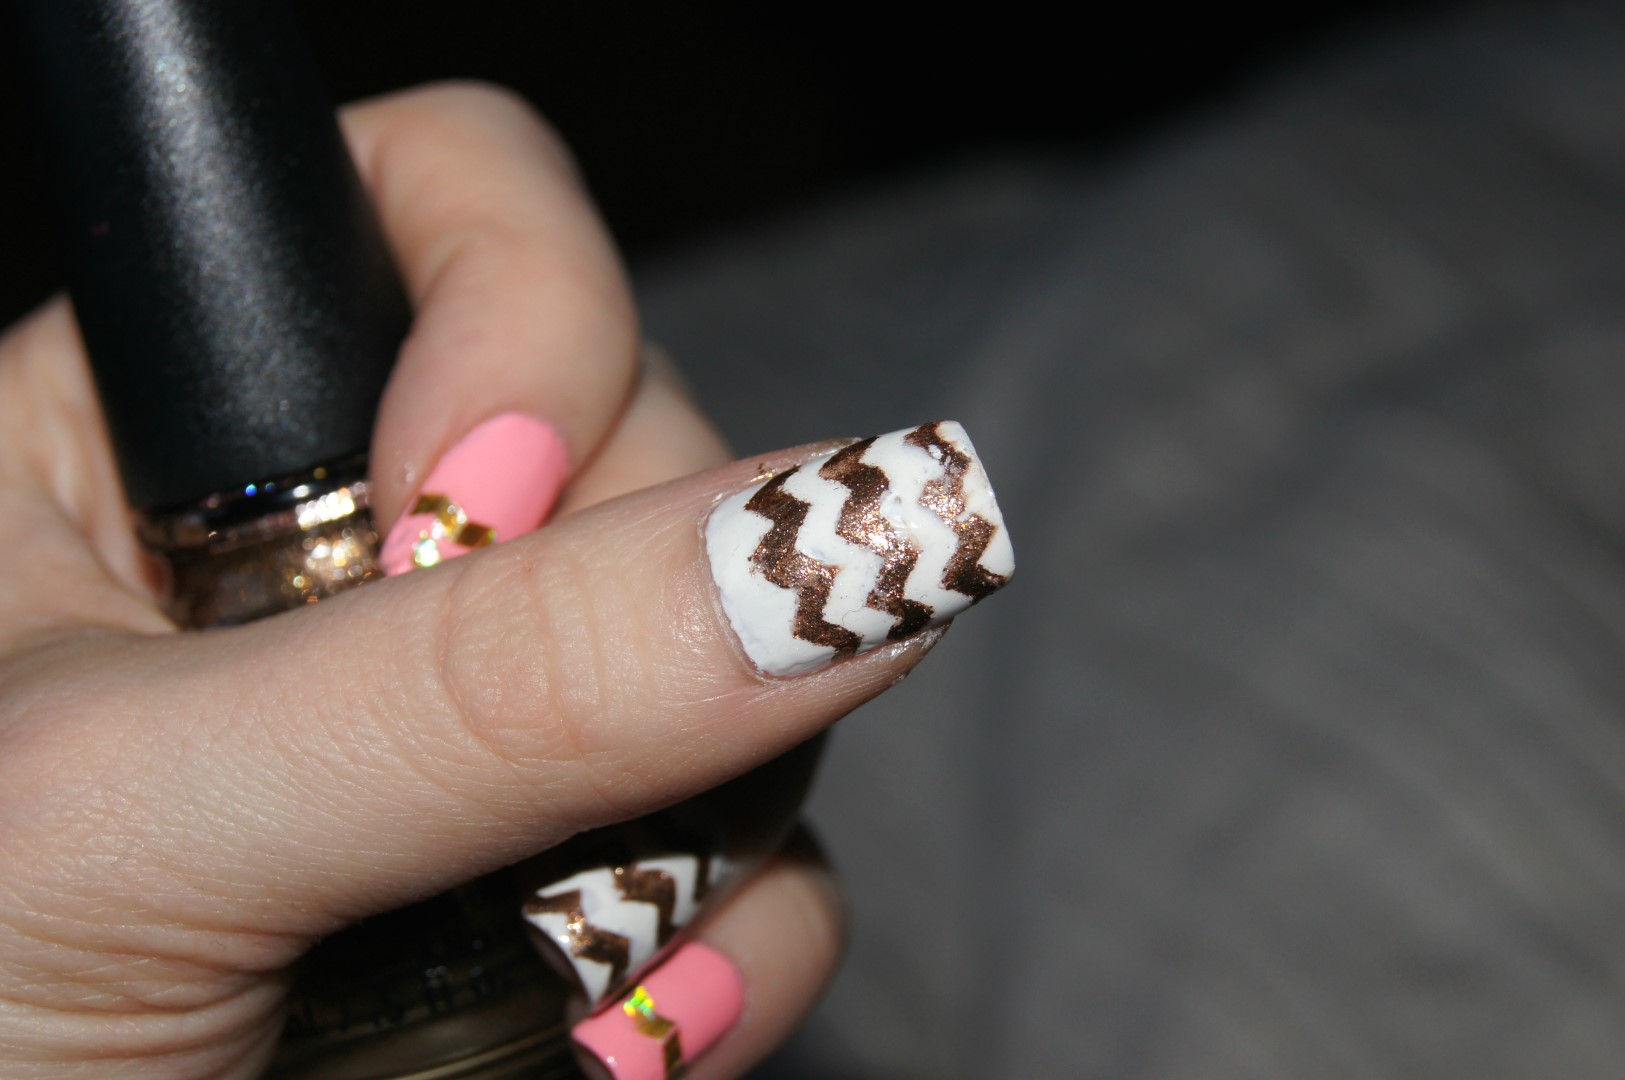
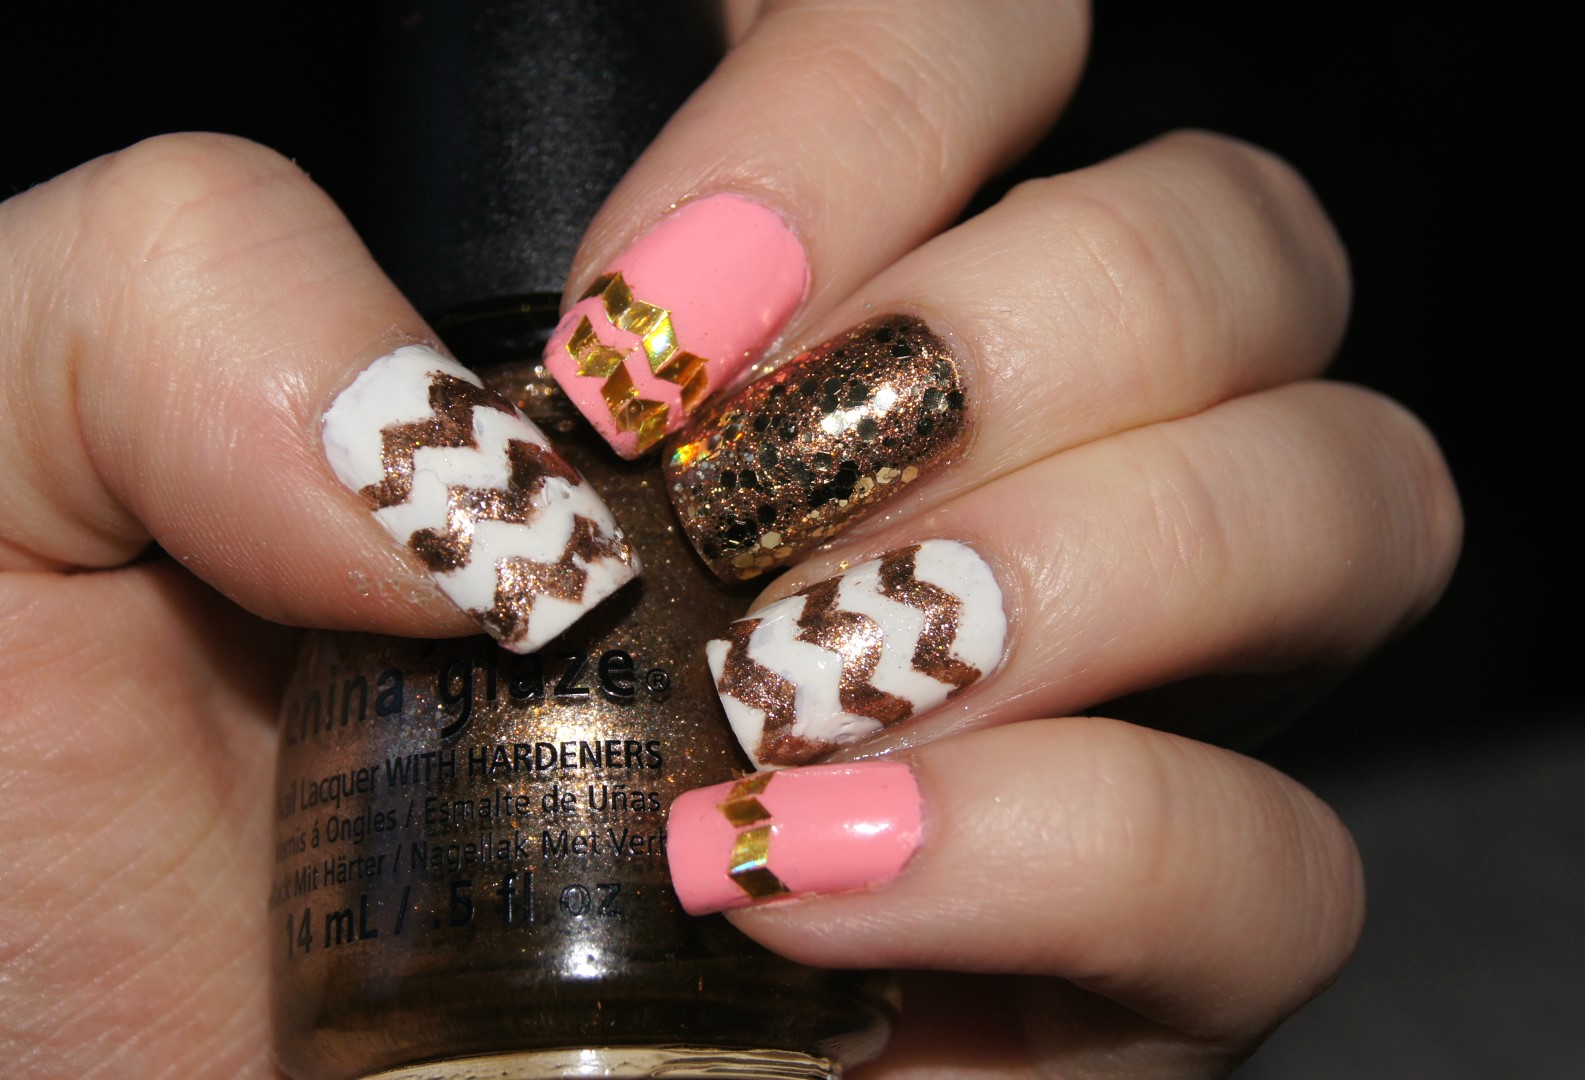
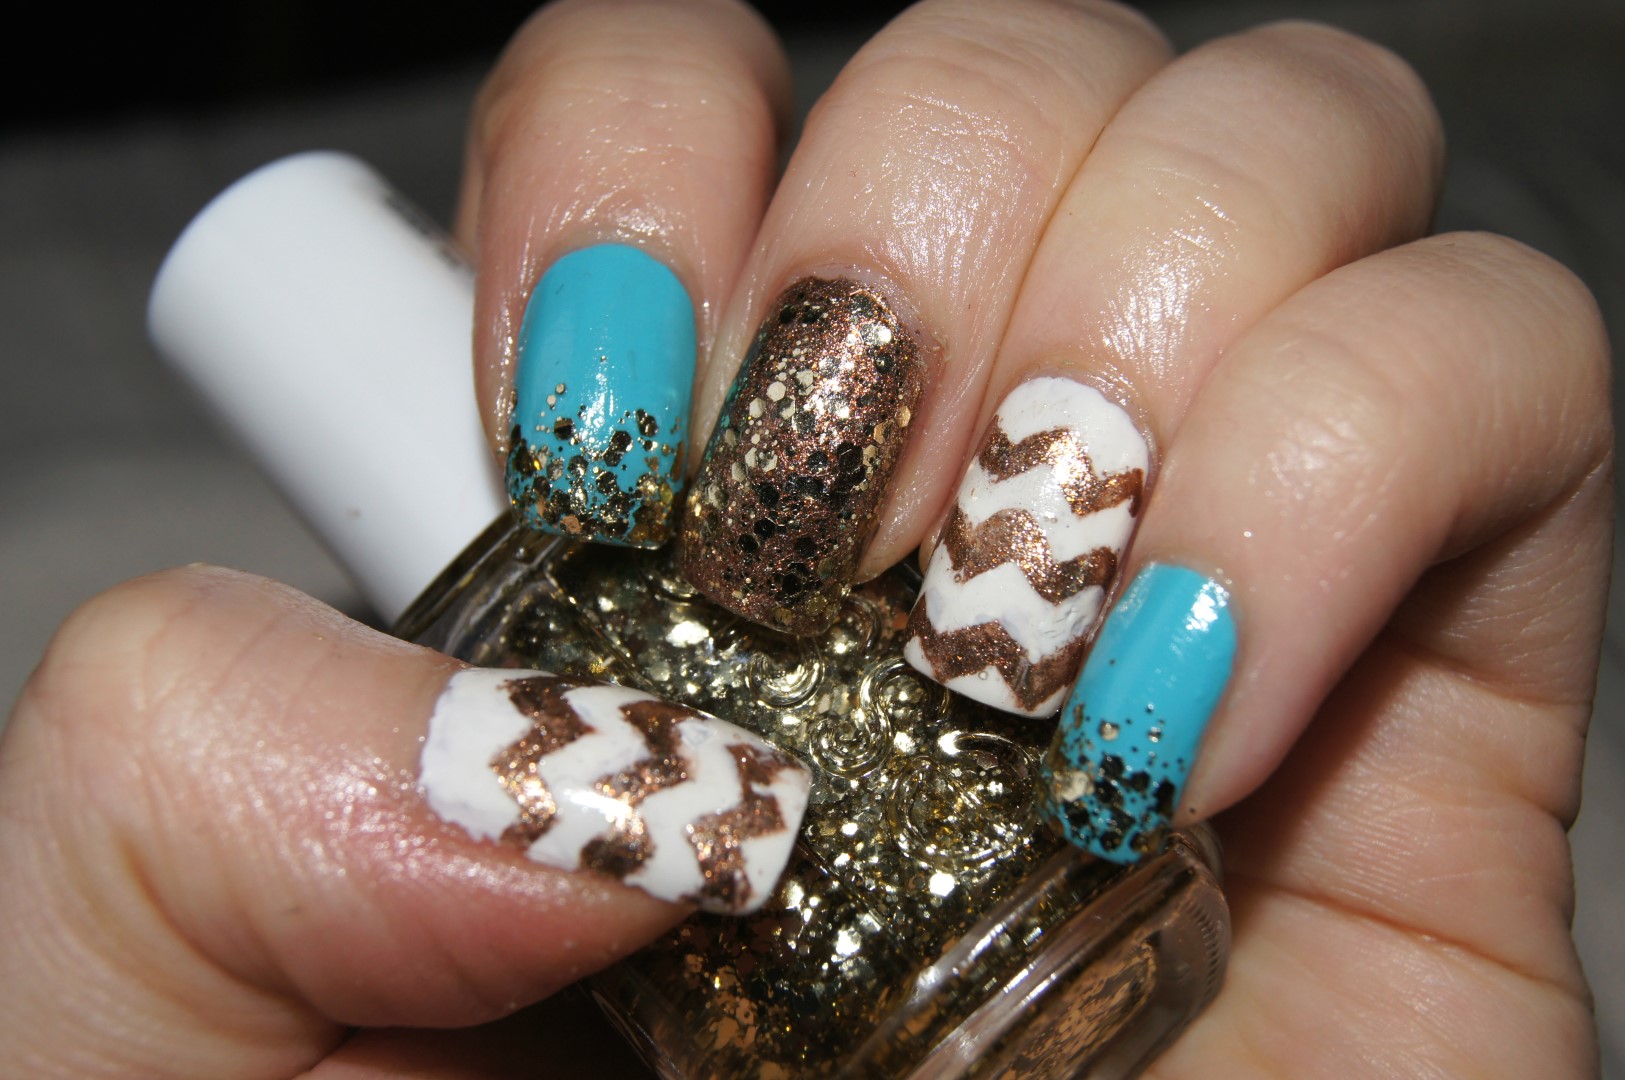
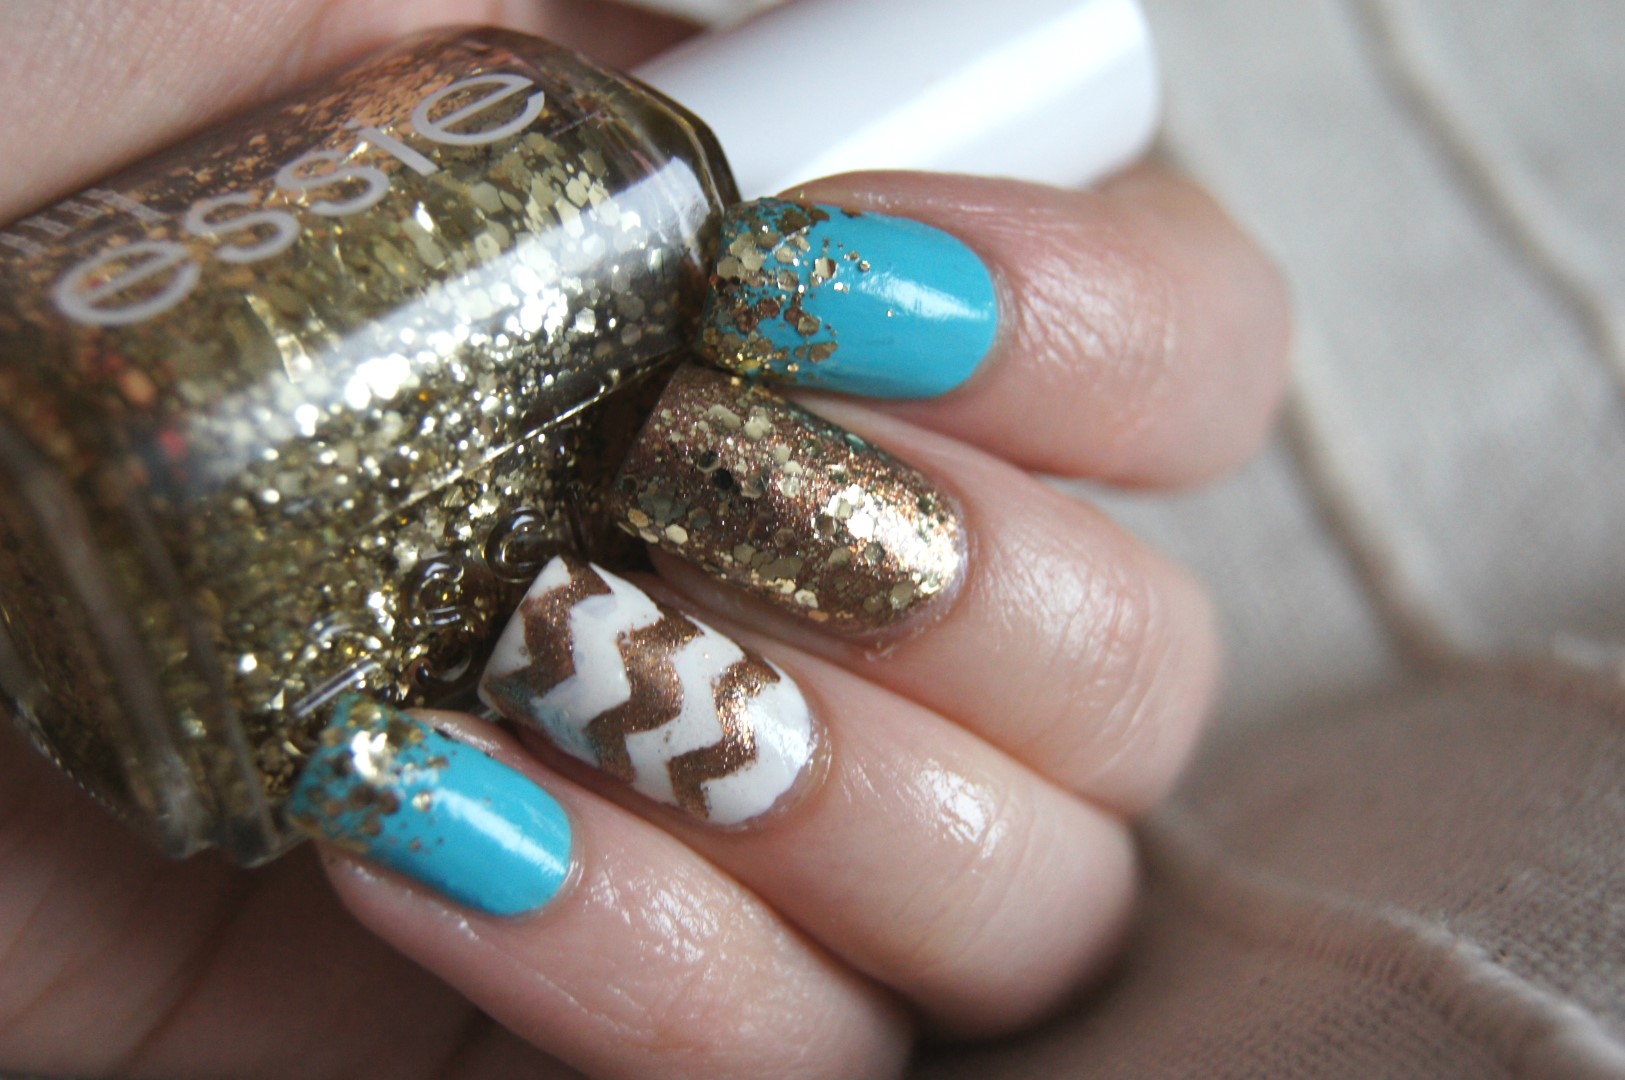
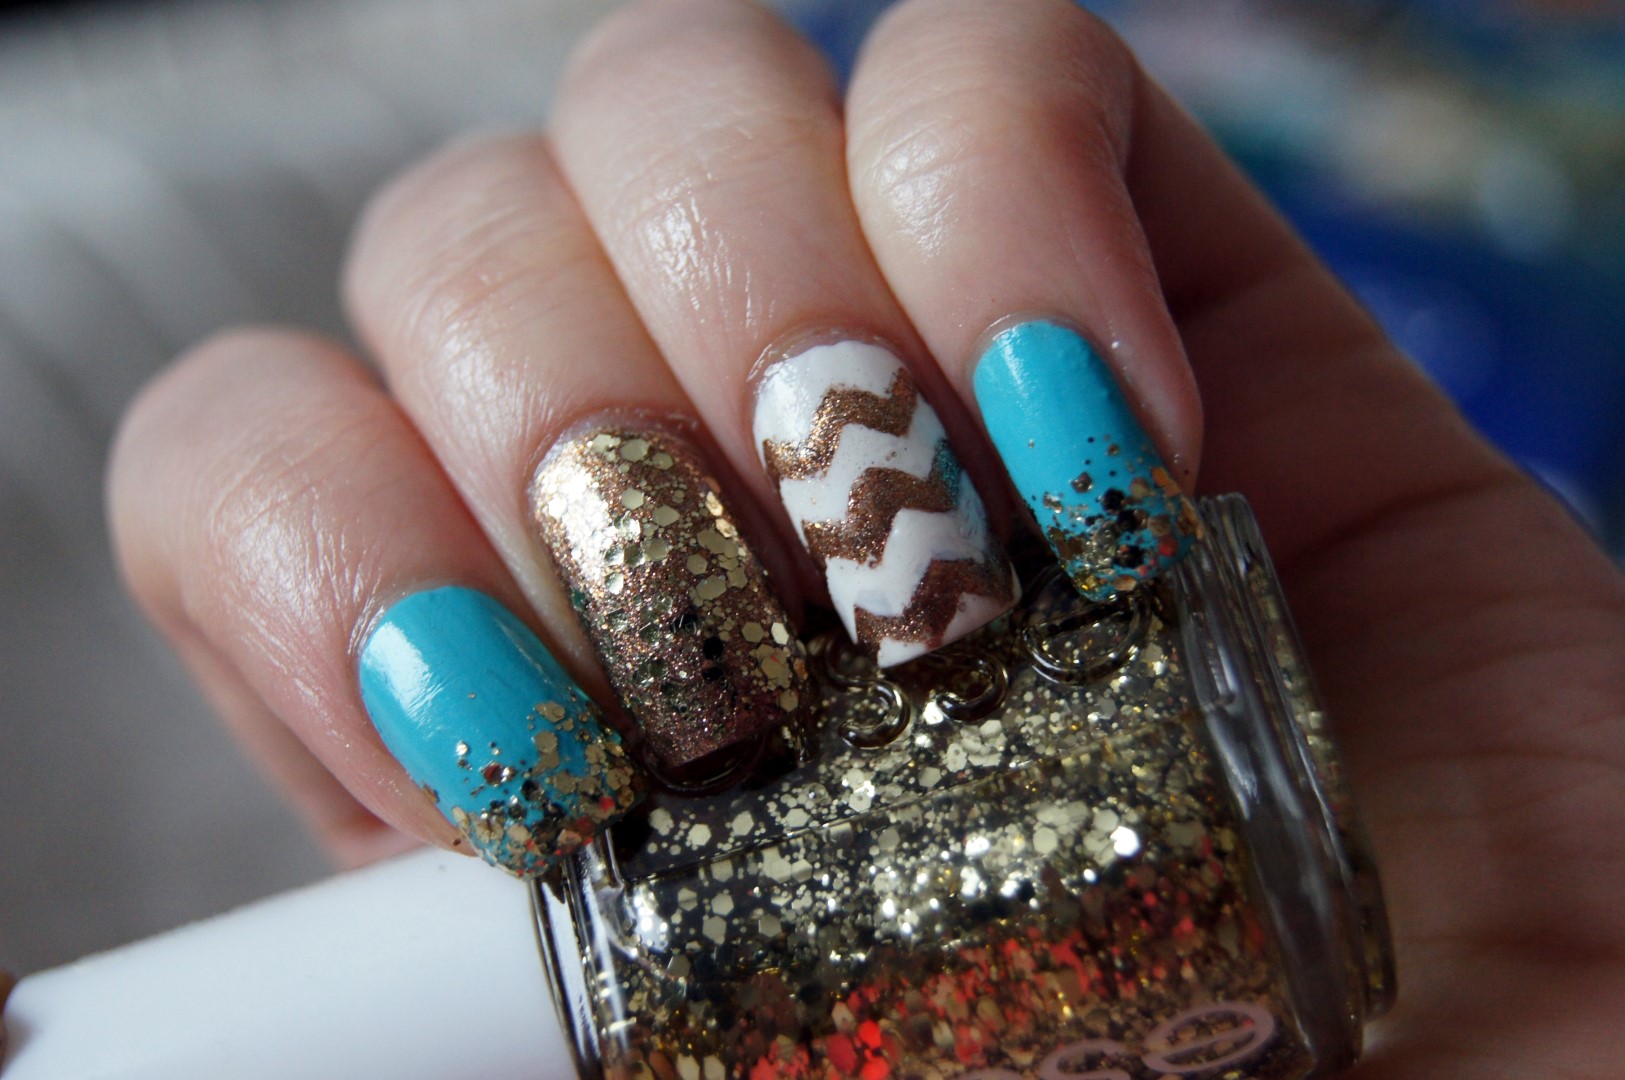
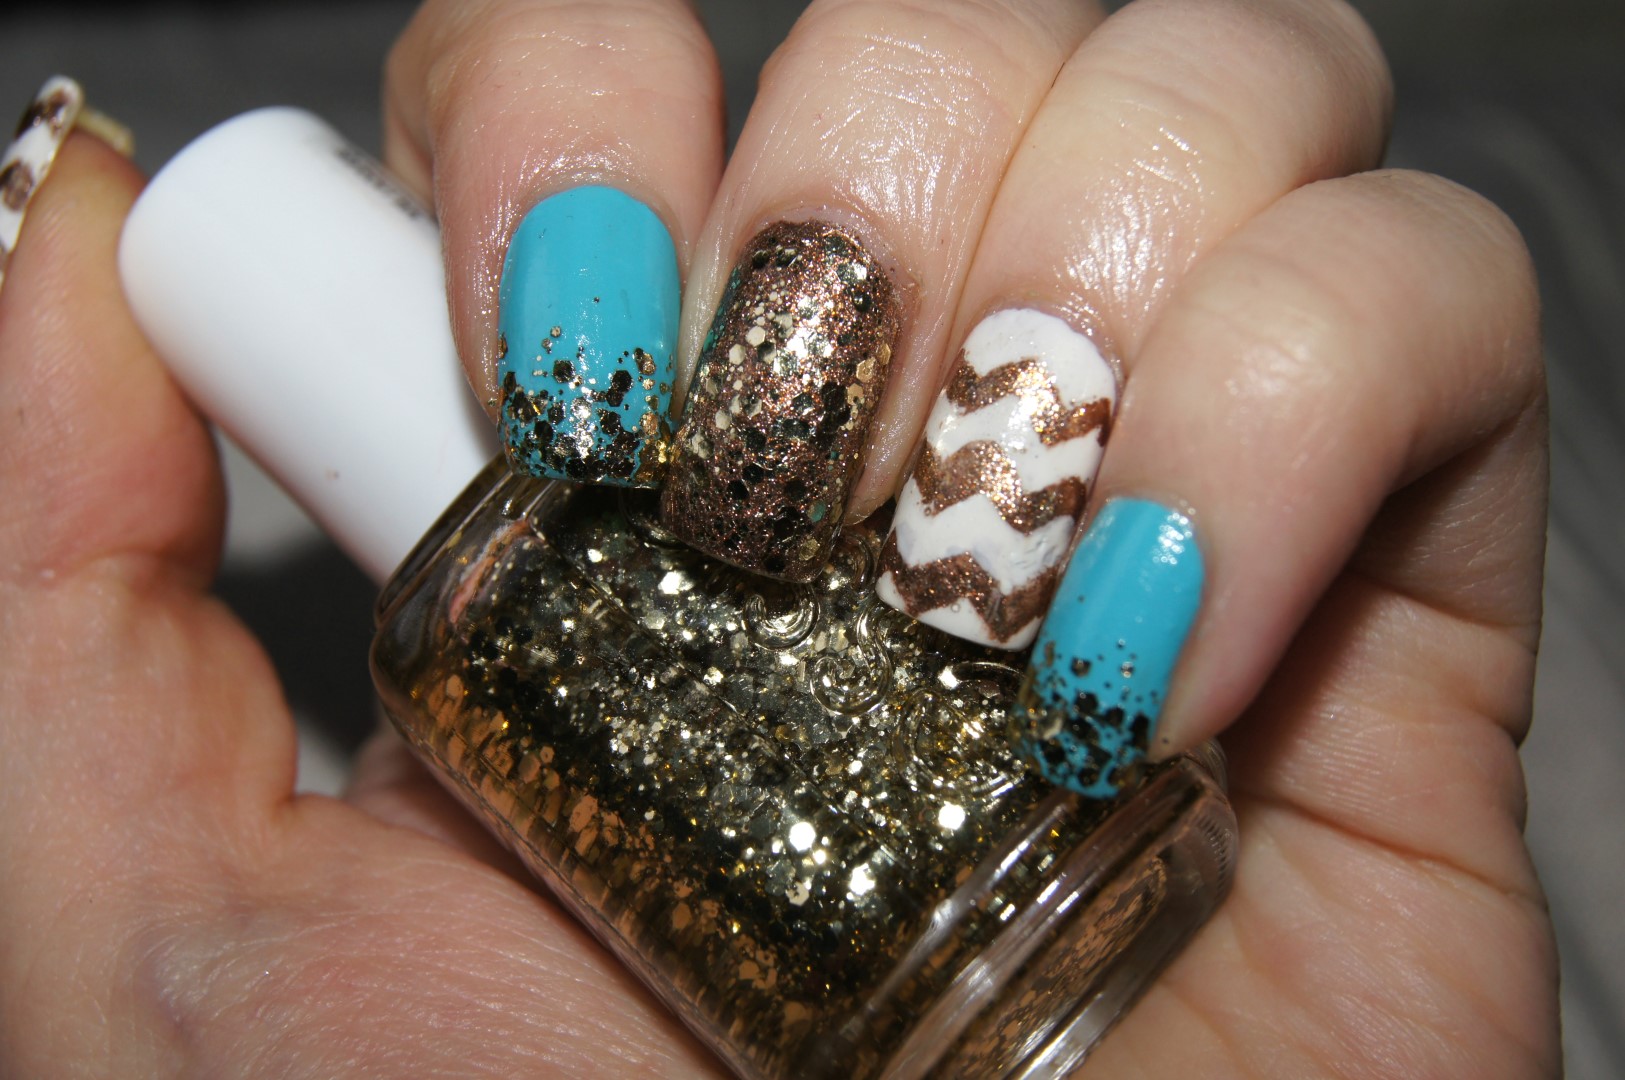
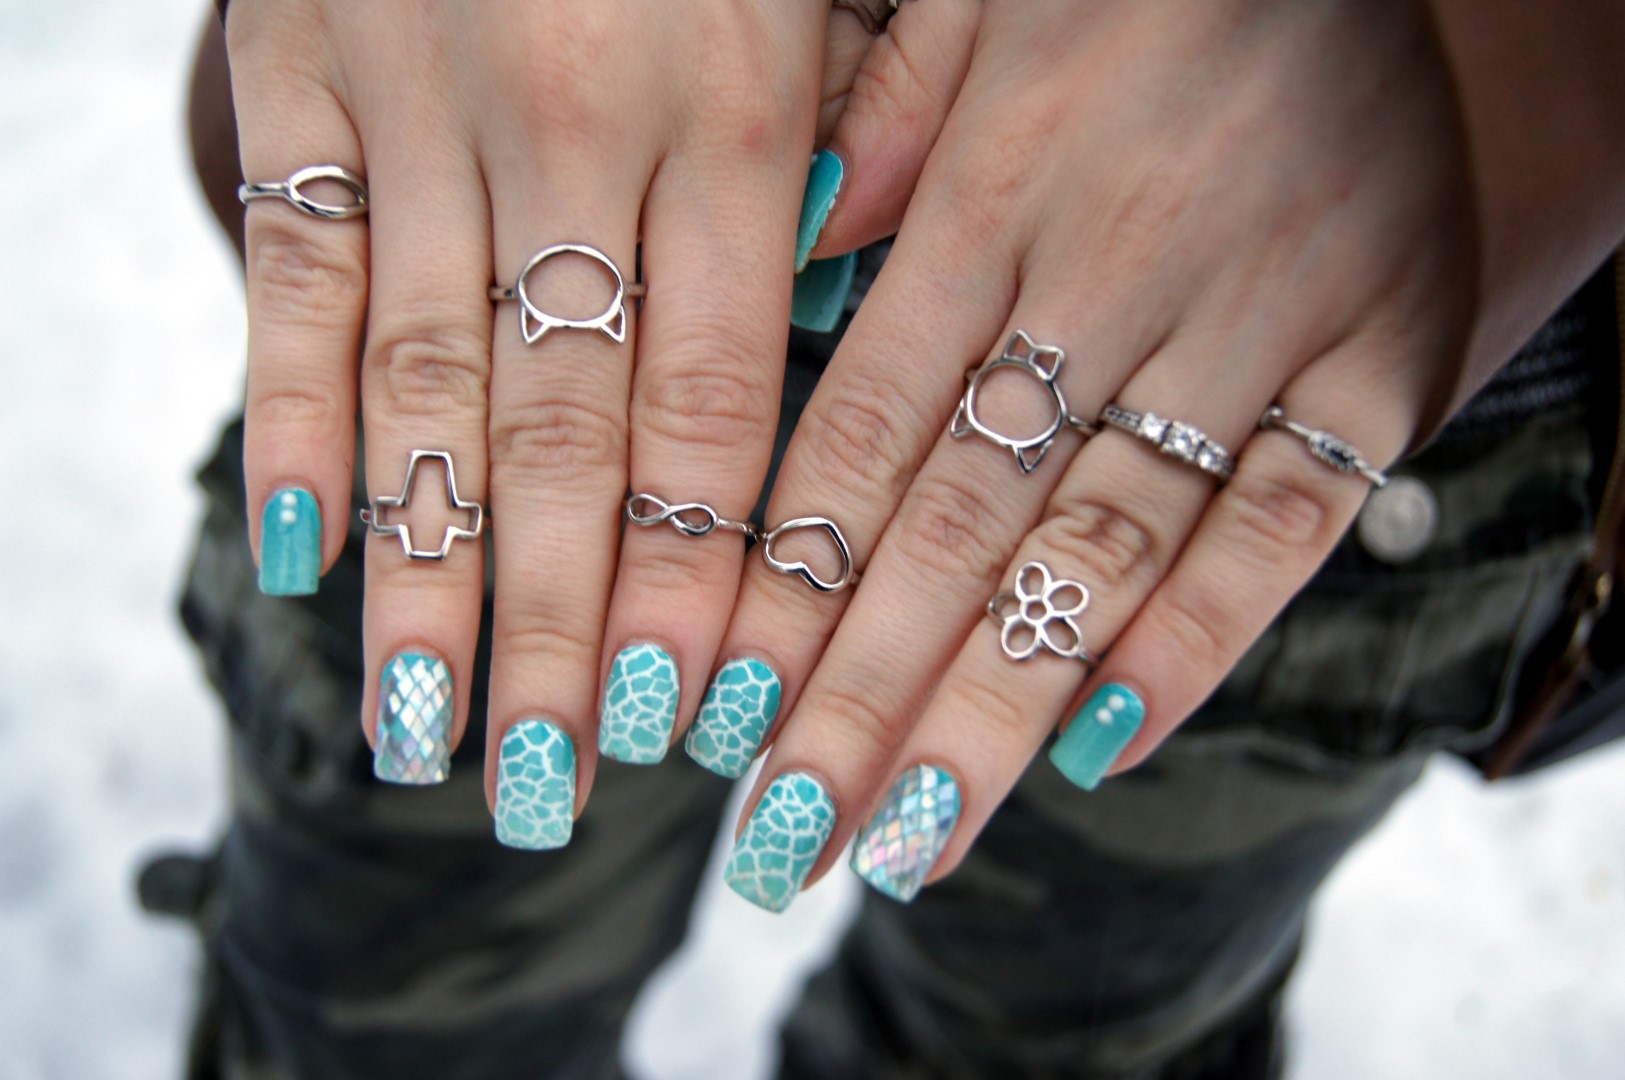
I'm happy to be writing again, all the schoolwork and projects and such have kept me pretty busy for a couple of days there. But after a good night's sleep and some relaxing, I finally have time for the things I love. As I'm writing this, I'm also creating my fourth Valentine's Day manicure. So if you're in need of inspiration for V-Day nails, check out tomorrow's post for some ideas!

Today, however, I'm co-operating with Insjö, who nailed the timing when contacting me, as I was about to post an updated "What's In My Bag" post. At the end of the post, I will talk more about Insjö and what they do, but first let's see what I actually have in my bag.

DSC04720 (Large)

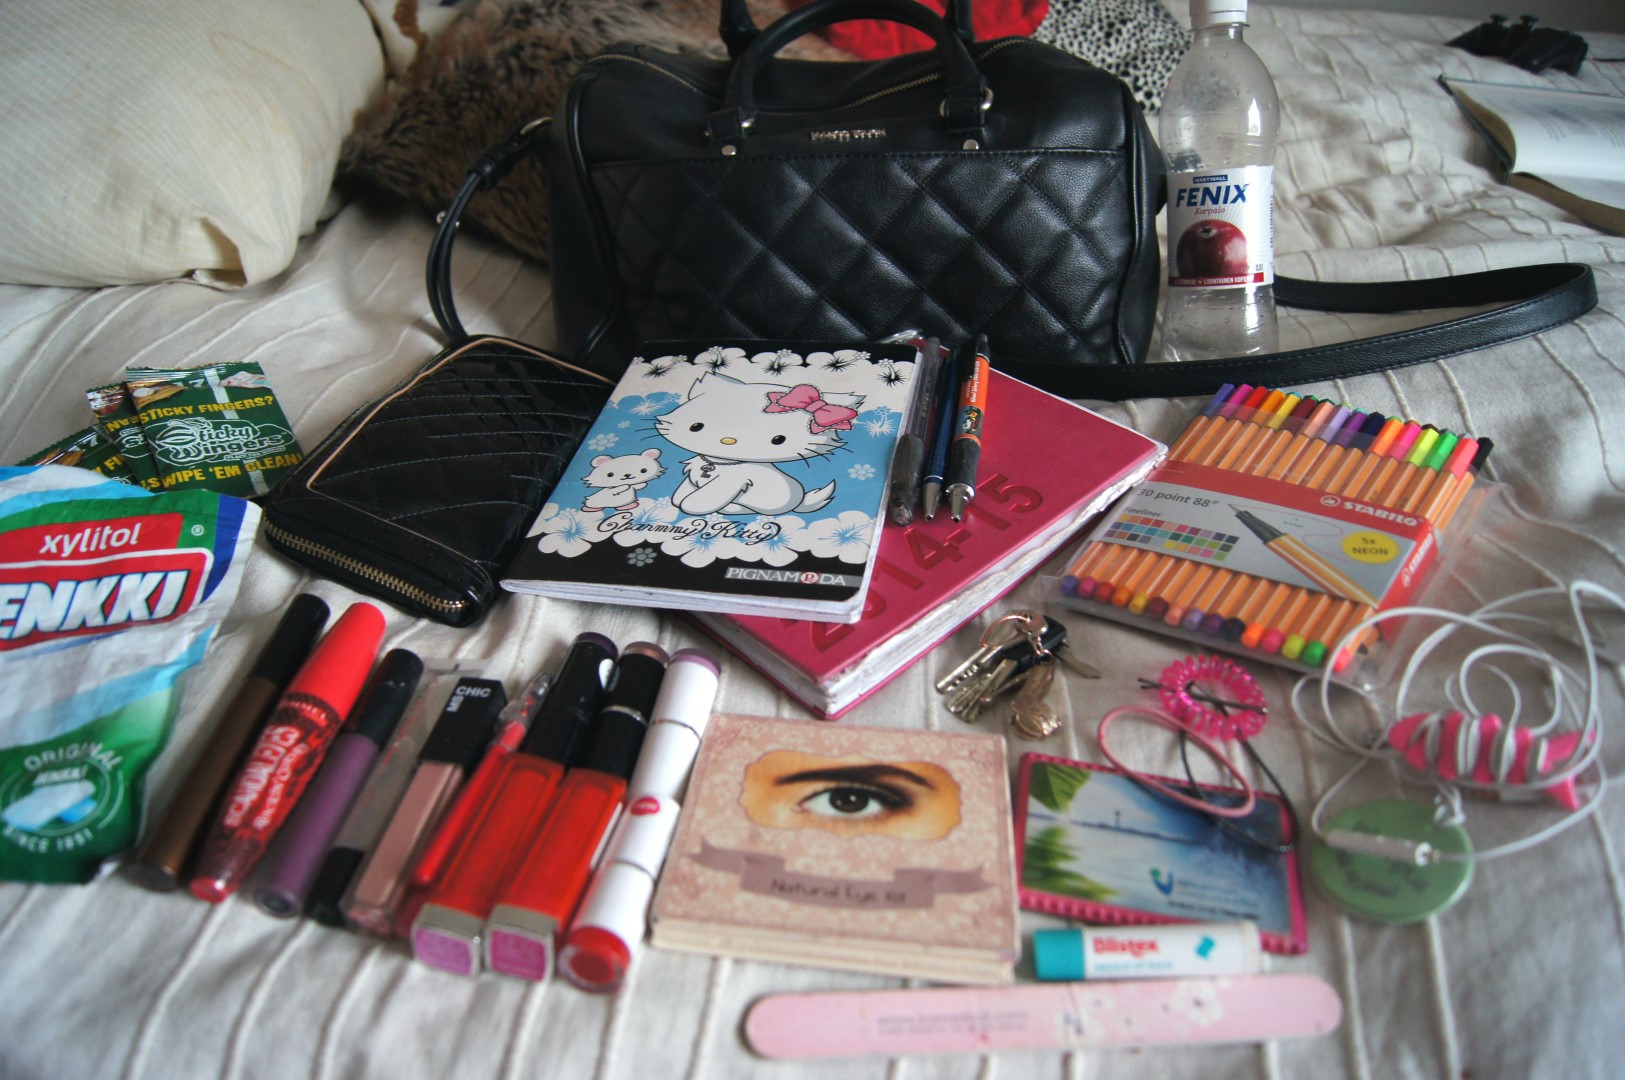
So, as you can see, I have a whole lot of stuff in my bag on daily basis. That's probably not bad, but I should make it less cluttered. Life goals, you know.

DSC04722 (Large)

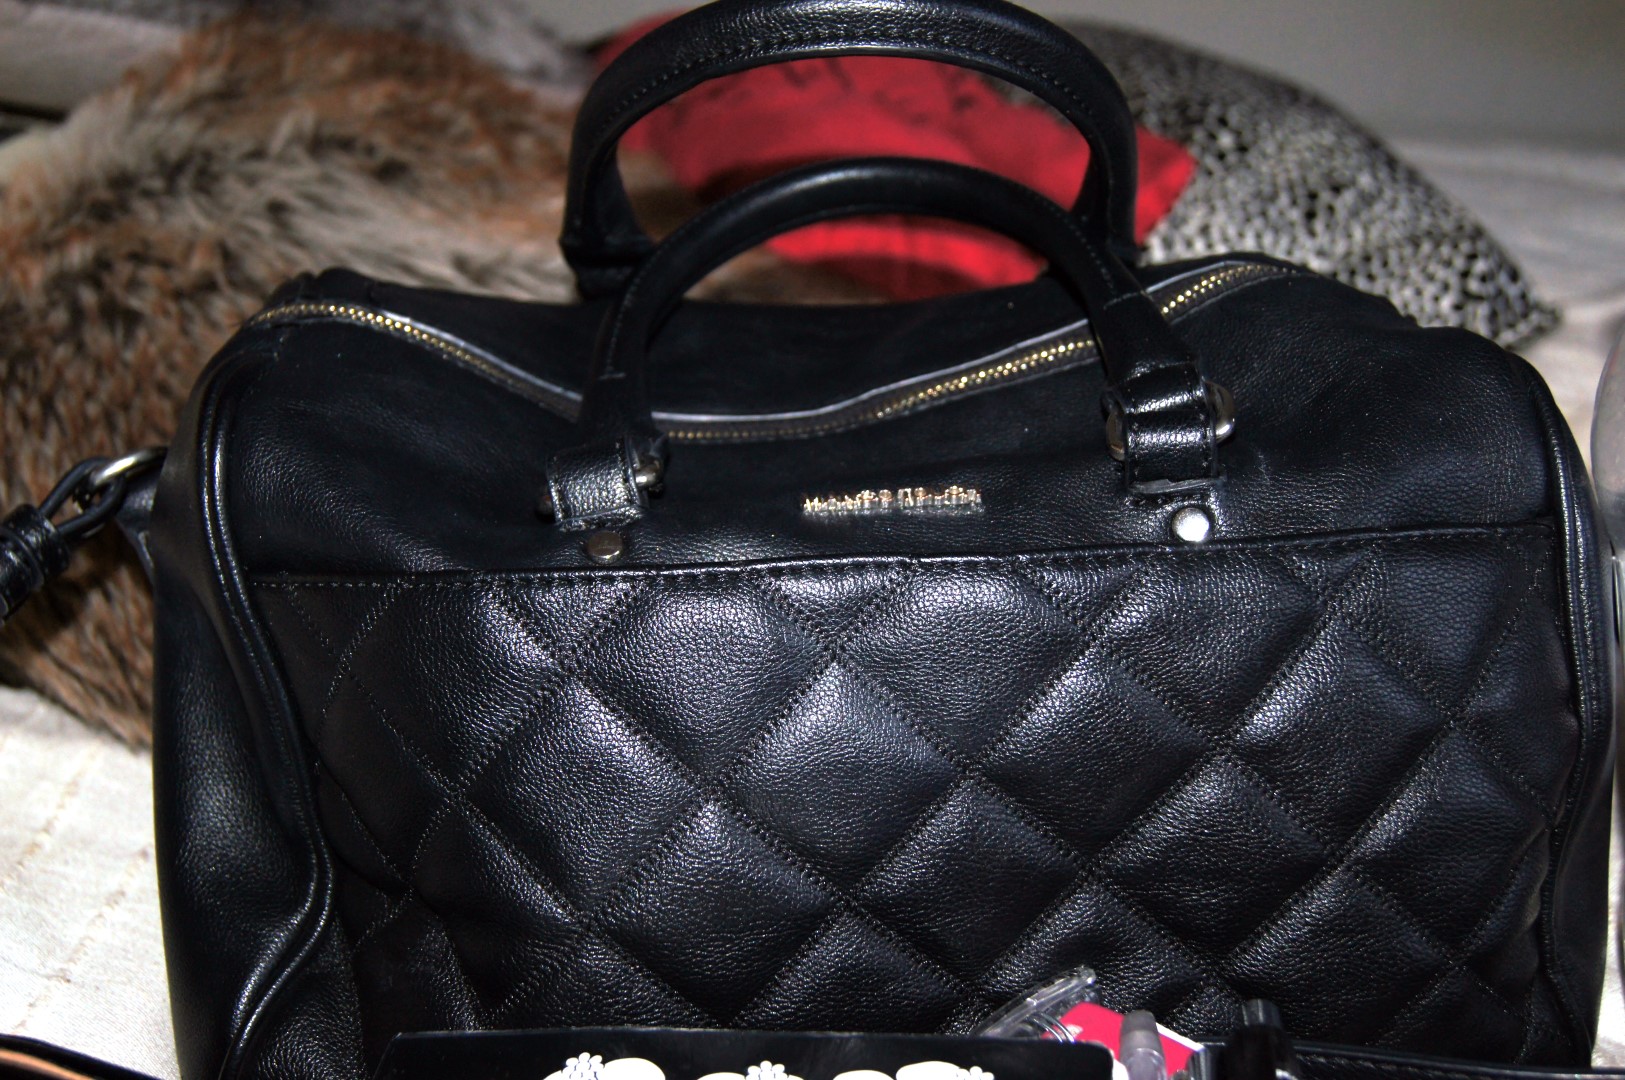
My most used bag at the moment is this cute black one from Mango. It holds amazingly lot of things, but I feel like I shouldn't stuff it so much. I'm seriously afraid I will break it.

DSC04725 (Large)

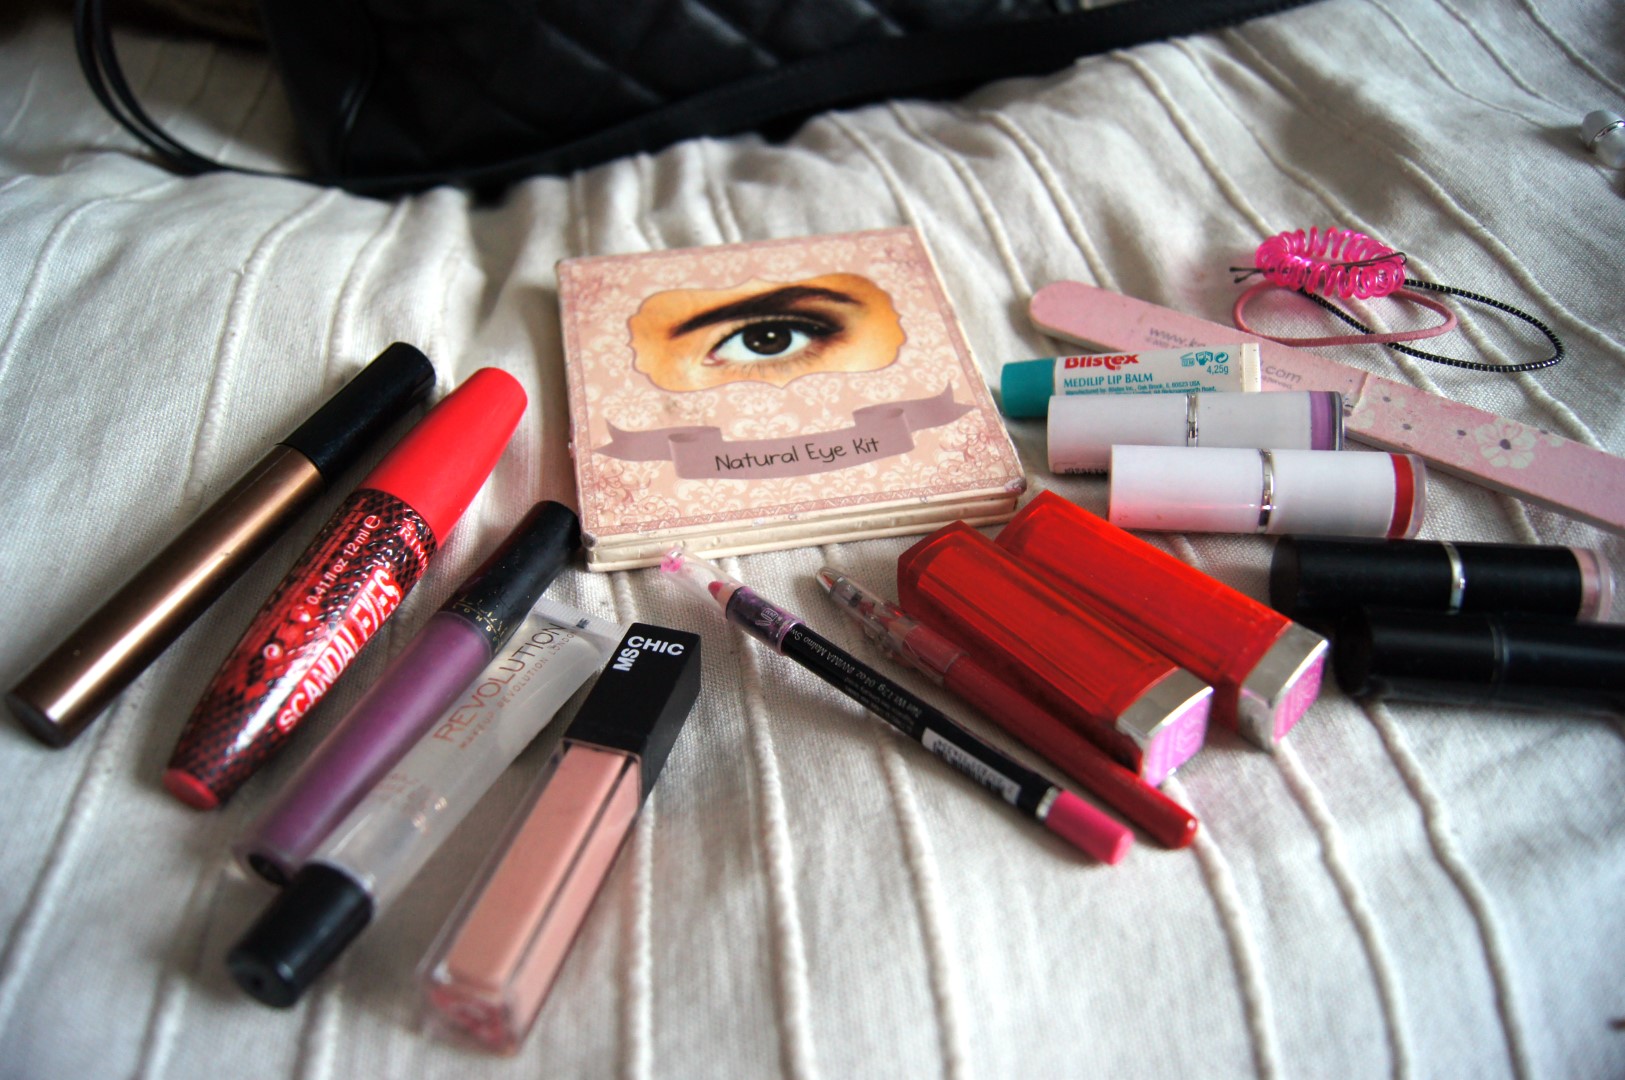
This is probably not a surprise to you, but I usually carry quite a lot of makeup around. Even when I don't wear any. It's because when I do, I tend to throw the ones I may need to fix during the day along - and then I just forget them in my bag. So after every few days, I need to clean these things out and put them in my makeup bag. I should probably have a carry-on makeup bag with me, but I haven't got around into making one.

DSC04727 (Large)

The necessities - my wallet, bus card, reflector (it's pretty darn dark in Finland in the winter), keys, gum, headphones (I need my music everywhere) and hand wipes, which I absolutely need in my bag. Usually there's also a pack of tissues, but this time I was out of those.

DSC04729 (Large)

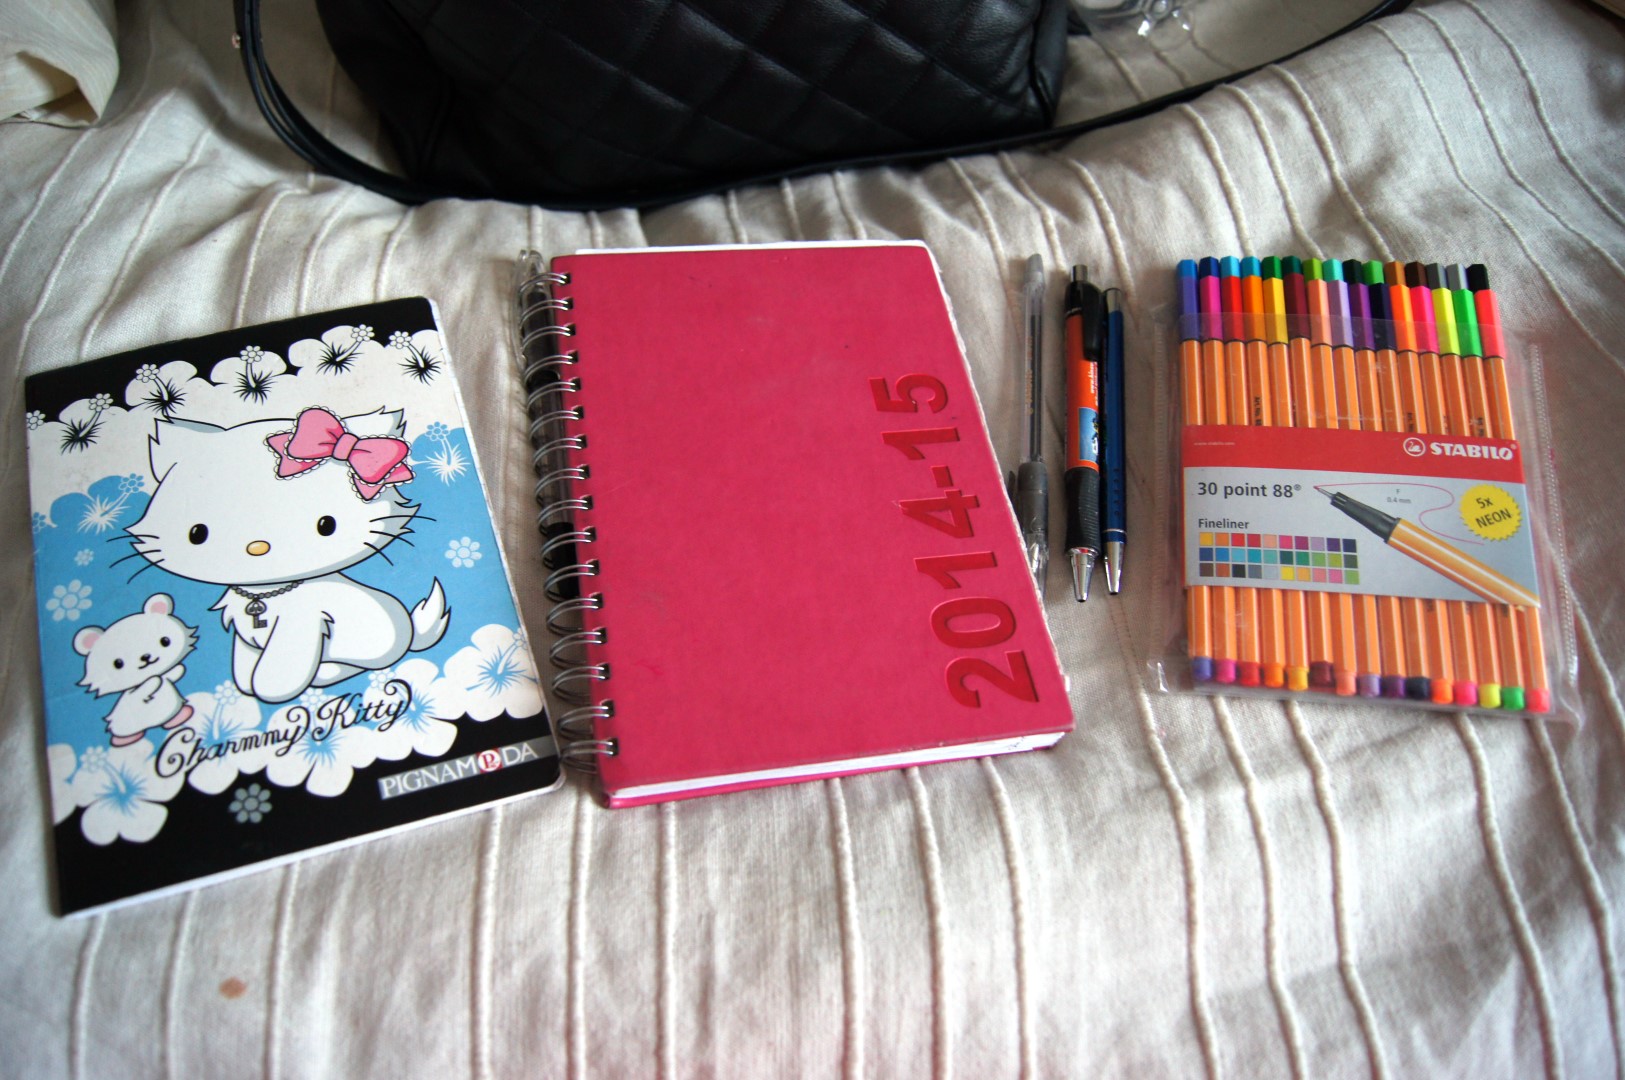
And of course, as a blogger and a student, I also have a calendar and writing equipment with me at most of the times. You never know when you need to write something down, so I think it's better to be prepared.

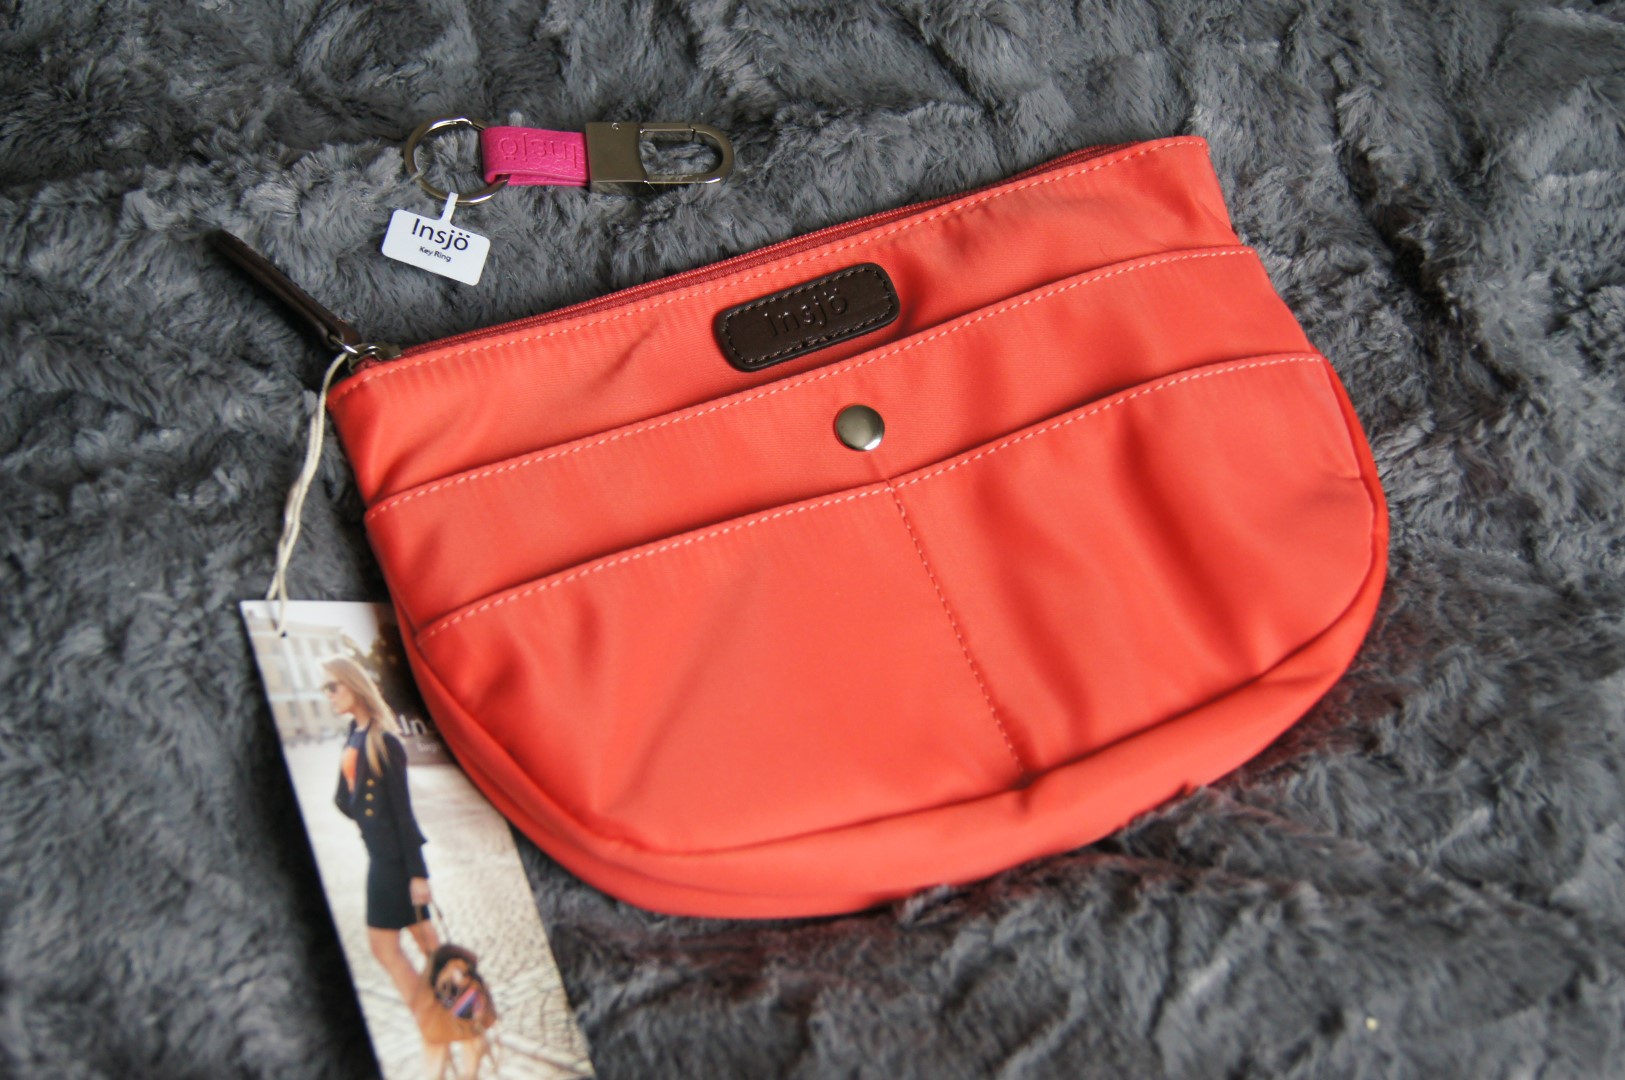
Now, like you saw above, I carry quite a lot of stuff with me at all times. That means the insides of my bag aren't always as tidy as I would like. That's why I was pretty excited that Insjö contacted me and sent me their bagINbag to try it out.

DSC04932 (Large)

I got this beautiful hot coral bag (in design called Inari) and a hot pink keyring, which are so cute and totally my color.

DSC04935 (Large)

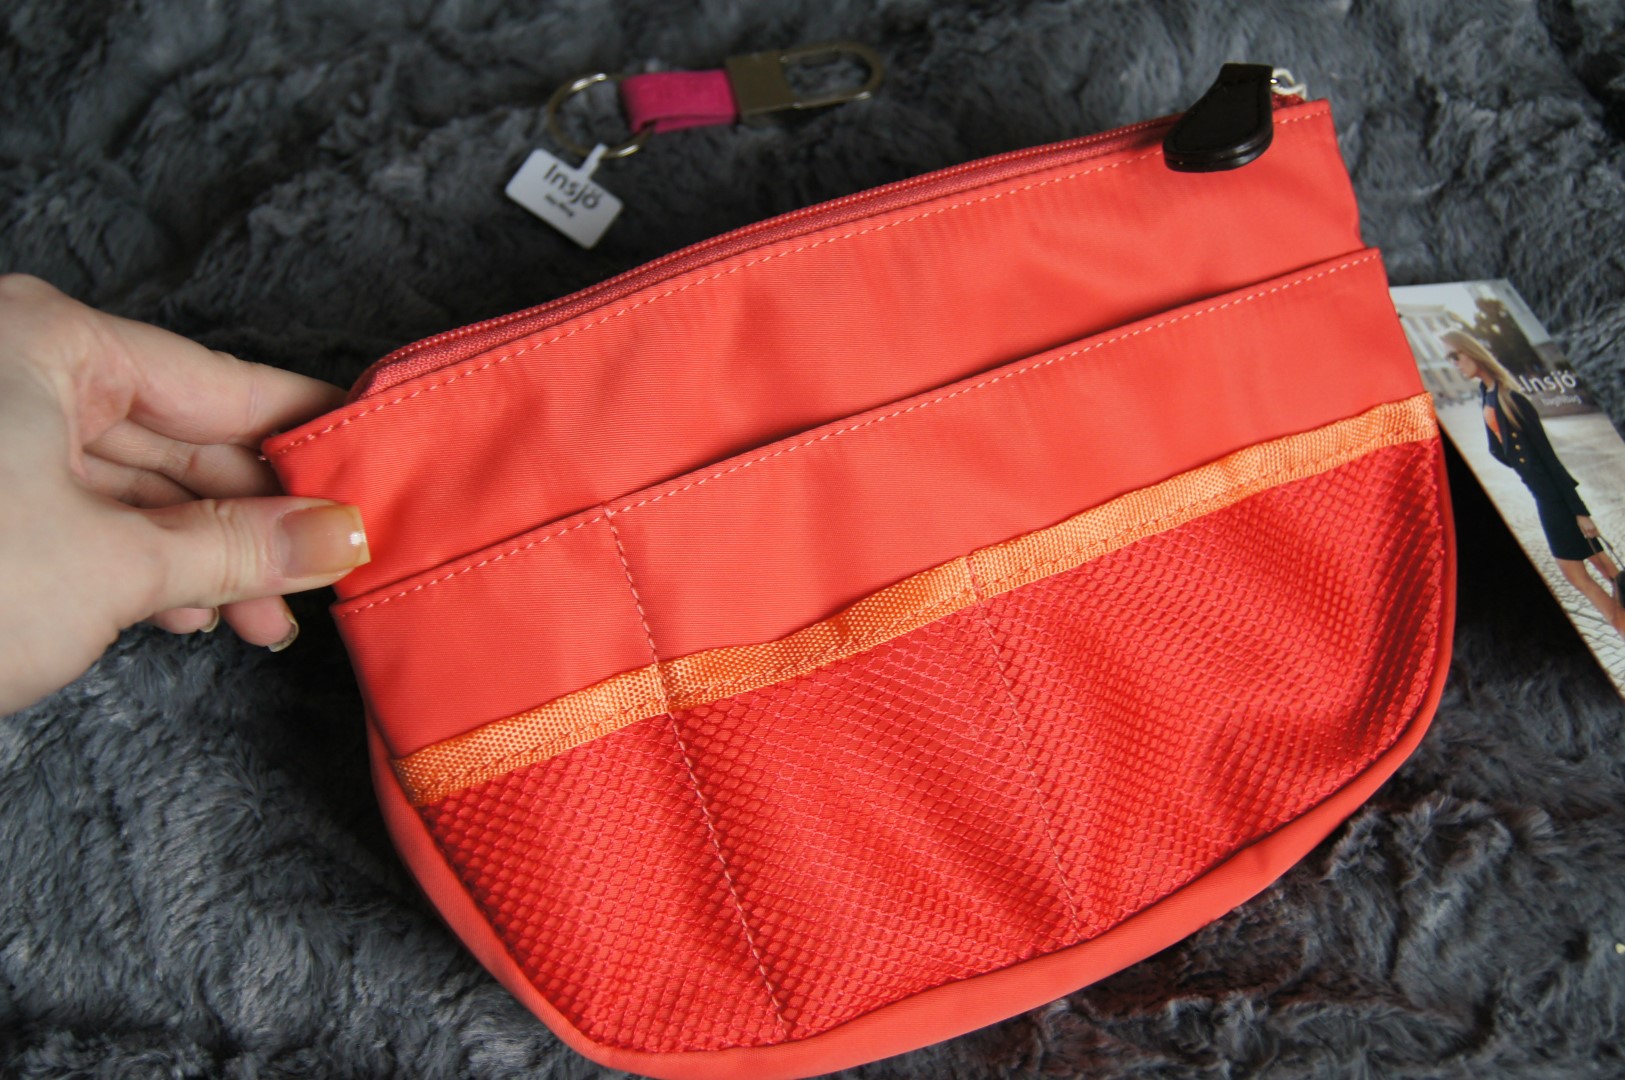
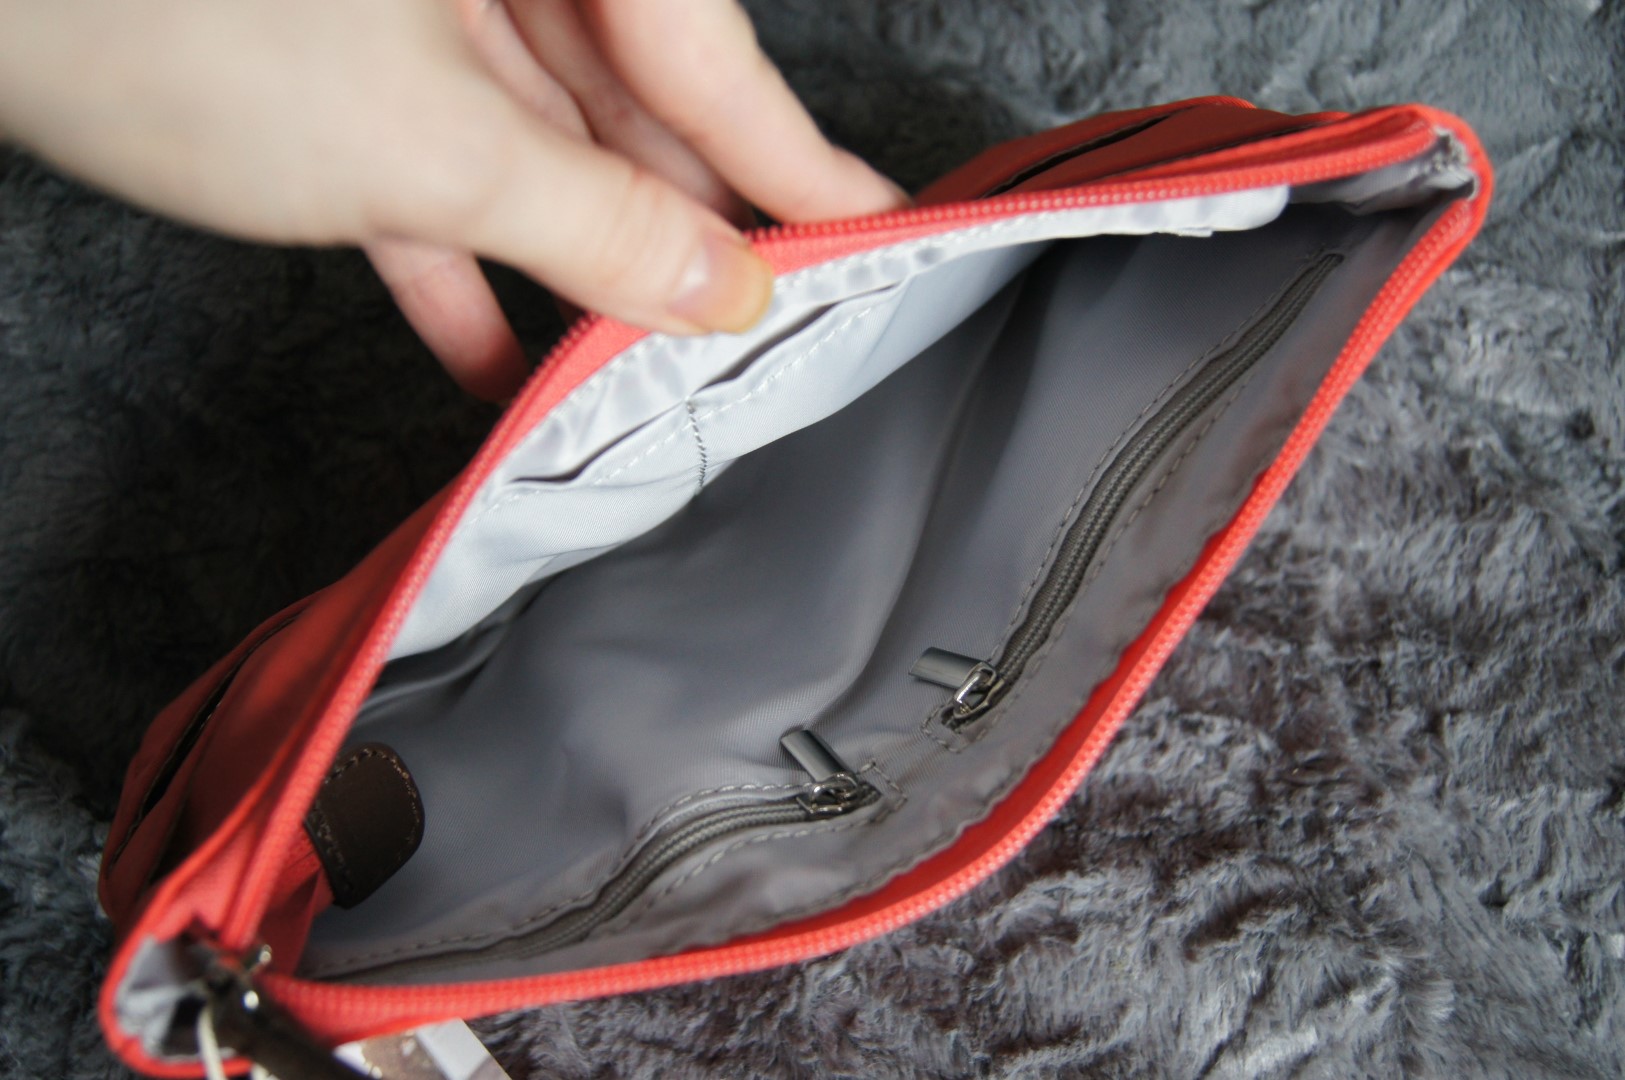
What I really like about the design of this bag is that it has so many different pockets. Both outside...

DSC04937 (Large)

...and inside as well! As a student, I can totally appreciate how this little bag could hold all the little stuff one needs everyday (student card, bus card, coins, keys, makeup etc.), and how easy it is to throw from one bag into another when you switch styles. I'm feeling this bag is great to have when you have an active lifestyle and need to change bags on the go and such. I think I'm gonna be a good friend of mine during the busy spring.

DSC04939 (Large)

The pink keyring is also very adorable. This one is for connecting your keys to you bagINbag. which is a good thing if you're one of those who just toss them into your bag (like yours truly). Very handy addition, and the color is just perfect.

All in all I feel that these items seem very durable and useful. I love the fact they are designed in Finland, and I love the colors a lot. I will be testing these out properly next week, when I have all sorts of things to attend to. And only then I can give my final verdict on these, but so far I'm feeling these are gonna be my friends. So thank you so much for collaborating with me, Insjö, this was such a perfect timing from your part!

Also, if you got interested in Insjö's products, they kindly offered me a discount code to share with you darlings. At the checkout, type in code JOVI1 to get a free shipping for you order. The code is valid for a month from today, so if you want to use it that's when you need to do it.

Now that I told you what's in my bag, I'd like to know what's in yours. If you have done a post like this recently, please link it below in the comments so I can check it out!

Now, I'm gonna edit the photos for tomorrow's post and chill a while before getting to bed. I hope you're all having an amazing weekend, my loves!

Have a great day ♥

Coffee Time ♥

Hello darlings!

How are you all? ♥

Today has been pretty inspiring in many ways, and I got new confidence for most of the different projects I have going on at the moment. I'm still not 100% sure how I will get time and energy to everything, but I won't let myself worry about it and instead I try to just do everything in time (more or less). What helps me get through is good food, and caffeine. Therefore, I'm sharing a tasty coffee recipe, as well as a gluten free mug cake recipe here with you.

DSC04830 (Large)

The other day I was really craving coffee and something sweet, so I thought I should make something good from the ingredients I had in hand - which was more than I usually have chilling in the kitchen. So what I whipped up was a Hazelnut latte with Red velvet mug cake.

DSC04833 (Large)

I don't drink black coffee as it is at all, so I've taught myself how to create different lattes and such (you know, lots of milk, too much sweet... that's the stuff). And with different syrups, it's easy to create all kinds of fantastic beverages.

Hazelnut Coffee (1 serving)

1 part strong coffee 
1-2 parts milk
1 tablespoon hazelnut syrup
whipped cream
caramel sauce

Heat up the milk with the syrup and whisk it a bit. Mix with the coffee, top with whipped cream and add caramel sauce. For the best taste, I would maybe recommend espresso, if you have that in hand, but I personally used regular coffee, just made it pretty strong. I didn't put exact measures for the coffee and milk as that really depends on your mug/glass/cup/etc. You can adjust the amount of syrup as well, I put max 1 tablespoon for a 0,3 liter IKEA glass of latte and that's perfect for me. You could also add some other sweetener if you think it needs that. 

DSC04834 (Large)

The recipe for the red velvet mug cake is from Epicurious. I had seen this recipe before and luckily I had the ingredients for it! I have no idea if my salt is kosher (probably not), I used pink pasta color instead of red liquid one and I switched the flour to gluten free one and added a pinch of baking powder to make it able to rise. I also had to make my own buttermilk, but luckily that's an easy job.

Red Velvet Mug Cake (2 servings)

1 large egg
3 tablespoons vegetable oil
1 teaspoon liquid red food coloring
3 tablespoons buttermilk
2 tablespoons pure vanilla extract
1/4 cup granulated sugar
2 tablespoons unsweetened cocoa powder
1/4 cup self-rising flour
Pinch of kosher salt
1/4 teaspoon cider, white, white wine, or rice vinegar

In a large mug, whisk together the egg and oil with a fork. Stir in the food coloring, buttermilk, vanilla and sugar. Add the cocoa, flour, salt and vinegar. Beat the batter until smooth. Divide the batter between two mugs. Microwave separately for 1 ½ to 2 ½ minutes each until risen and firm.

You can top the mug cakes with whatever you like, cream, marshmallow frosting, anything. If you wanna do it like I did (meaning: you don't have proper ingredients for frosting, namely powdered sugar, in the kitchen), here's the recipe I made up for that:

Vanilla Cream Cheese Frosting

3 tablespoons vanilla cream cheese
1 tablespoon butter
2 tablespoons honey

Mix the butter and honey into as creamy mix as possible. Add cream cheese, and mix well. Add on top of the mug cakes (with sprinkles, if you wish).


Do you have any great mug cake or coffee recipes? I'd love to try new ones ♥

Now, I'm going to get a little night snack and watch some TV with my man, but I'll be back soon with another post. Stay tuned!

Have a lovely day!

Chevron In Two Ways ♥

Hello everyone!

How are you all? ♥

I've been keeping myself busy with school work, cleaning and cooking today, and I've been loving every minute of it. Though I'm just as grateful to get to go out to lunch meeting with our project crew tomorrow. I feel lucky to be working alongside such amazing group of people, and I must say I'm more into this school assignment than I ever imagined I would be. Even if it takes up loads of my time and energy. It's completely worth it.

Today, I really wanted to share some nail designs with you. These two include chevron print, which is something I would love to use more when  do more simple designs. But you know how I like to go kind of overboard with these as well as with accessories. See below for the pictures!

DSC04653 (Large)

First up is a kind of classic color combo of pink, white and gold. Very girly, and actually something I liked more than I thought I would. I was trying to also create chevron with glitter, but that wasn't as much of a success as I had hoped. But practice makes perfect so I guess I just need to try again until I nail it (pun indented).

DSC04668 (Large)DSC04664 (Large)

The chevron print was done with the help of Nail Vinyls, since I would never have a hand steady enough to create straight lines for this.

DSC04660 (Large)

The polishes I used for this mani were China Glaze Goldie But Goodie, White On White and Feel The Breeze, and Essie Rock At The Top. The diamond shaped glitters are from Born Pretty Store.

DSC04674 (Large)DSC04695 (Large)

The other mani was kind of created by accident as the one seen above totally shed the glitters of the next day after applying. I'm pretty sure I did something wrong there, but I fixed it with a new mani. I left the painted chevrons and the cold nail on, and just replaced the colorful ones. I went for the easy go-to look, which for me is the glitter gradient. (I feel that's always a safe choice.)

DSC04718 (Large)DSC04705 (Large)

The polishes are same as above, just replaced the pink (Feel The Breeze) with China Glaze Capacity To See Beyond. The glitter polish is the Essie one mentioned above.

DSC04701 (Large)

So if you ever wonder what I do if a part of a manicure falls apart way early, or a part I like lasts longer than I thought, this is it. I try to make something new out of it (or around it, whichever you prefer).

DSC04719 (Large)

So what do you guys think about these? And do you like either one better? Let me know in the comments below!

Now, I'm going to spend some time with my man before bed. Tomorrow I need to be all energetic and ready for the project stuff, so I try to get some sleep nice and early for a chance to do some morning workout before the lunch meet. But I'll be back soon, with something non-nail-related stuff. ;)

Have a fantastic day, dolls! ♥

Camo and Leather ♥

Hello my loves!

How are you all? ♥

I've started the week with working from home as I had so much to do here that I figured I'd save time by doing my exercises on my laptop instead of going to school. I love how there's the option to do that sometimes instead of going to every single lecture. Of course I like to go most of the time just to stay on top of my game - I learn better in lectures - but it's nice to be able to take the day off every once in a while. Like now, when I'm sitting on the bed with a cup of green tea and one of my favorite shows in the background.

Earlier today I went jogging after a long break from it, as my mom was kind enough to buy me a pair of Icebugs, so that I wouldn't slip and fall. It felt good to be out running/walking again, without the fear of getting clumsy and having an accident. The snowy landscape I was jogging in is much like the one seen in the outfit pictures today.

DSC04634 (Large)DSC04641 (Large)DSC04643 (Large)DSC04625 (Large)
DSC04649 (Large)DSC04622 (Large)DSC04639 (Large)DSC04652 (Large)DSC04619 (Large)

Camo pants: secondhand Coat: ONLY Combat boots: Skobox Knit: secondhand Cap: H&M/DIY Scarf: Gina Tricot Bag: Mango Earrings: JC Rings: Gina Tricot

I feel like I wear a lot of tomboy clothes in winter, and this outfit is no exception. I really like the elements here - especially the camo pants and the boots - and I kinda feel this represents my inner rocker girl pretty nicely. The coat is probably 4 years old, but I still like it so much I couldn't imagine throwing it away. (Although I really need to clean out some other things from my closet this spring.)

What do you guys think about this look? Let me know in the comments below!

I'm gonna go now to edit few pictures for later this week, and then I will enjoy some homemade gluten free bread (score!) with peppermint tea. Tomorrow, I will be quite busy with school projects, but I will probably have some time to write a quick little post for you. Stay tuned for that!

Have a fabulous day ♥

Let's be friends in IG!